Increasingly, Customer Support teams are expected to be more data-driven. Whether that’s using reporting tools to stay on top of their workflow, reacting fast to sudden changes, or using KPIs and benchmarks to improve performance over time.
In the best Customer Service teams, KPIs and reporting are not just the responsibility of management. The entire team contributes to a culture of performance – where everyone is aware of key metrics, and how they relate to delivering first-class service.
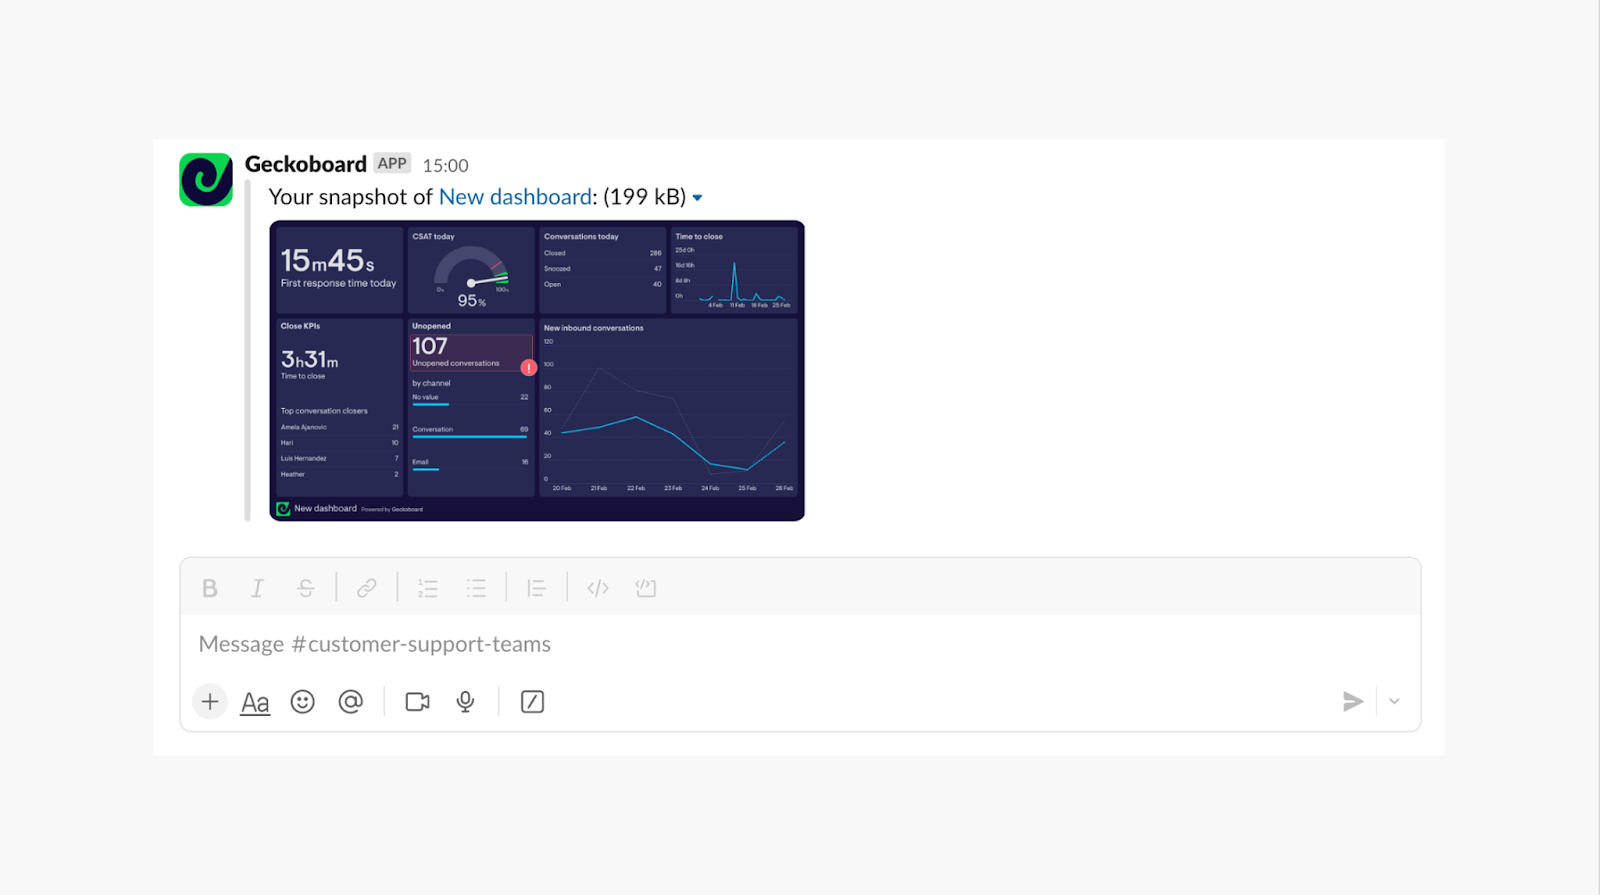
In last week’s article, we explored how to set up a TV dashboard to display real-time Intercom data in the office. However, if your team is hybrid, or fully remote, then it’s likely you use collaboration tools, like Slack, to stay up to date.
In this article, we’ll show you how you can use our Slack Integration for Intercom to set up automated reports and alerts in Slack, using your most important Intercom metrics. We’ll also explore how you can use Slack to support a fast-moving, data-driven culture within your support team.
What are the benefits of displaying Intercom metrics in Slack?
There are multiple benefits to setting up automated KPI reports in Slack:
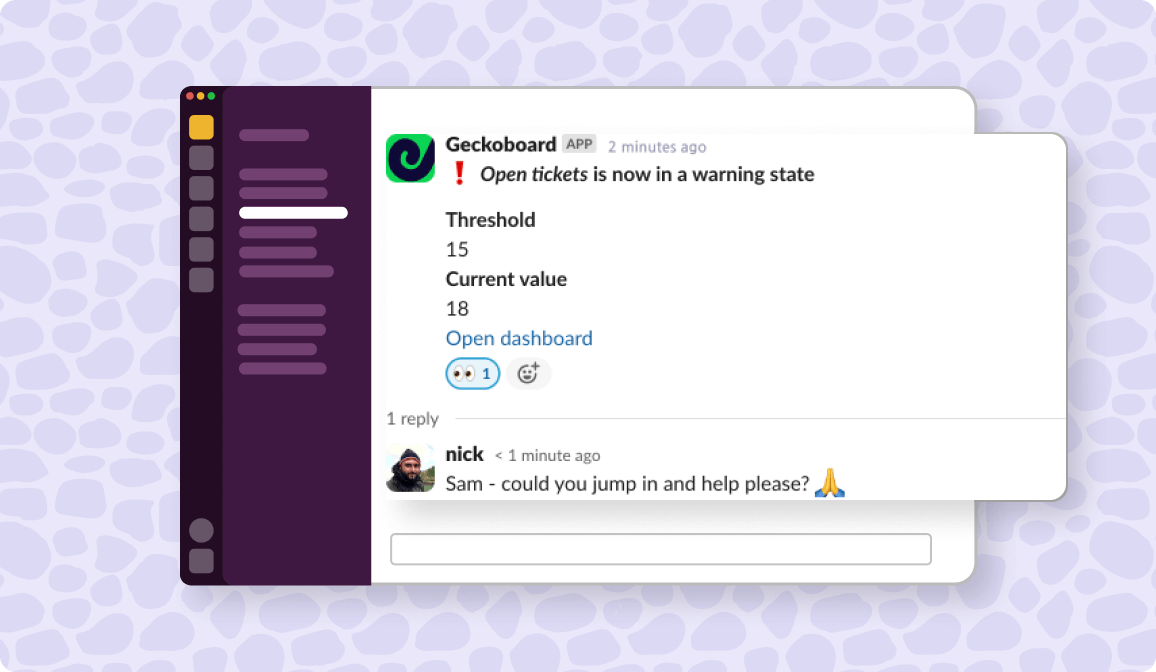
- Team alignment: regularly sharing a visual report of your KPIs helps the team understand which metrics are important, and how they are changing over time.
- React quickly: by setting up KPI notifications, which trigger when certain metrics rise above (or dip below) a set benchmark, you can ensure the team notices quickly, and reacts fast.
- Save time: If you’re pulling together and sharing Intercom reports manually, you can save time by automating this process.
How to set up automated Intercom reports in Slack?
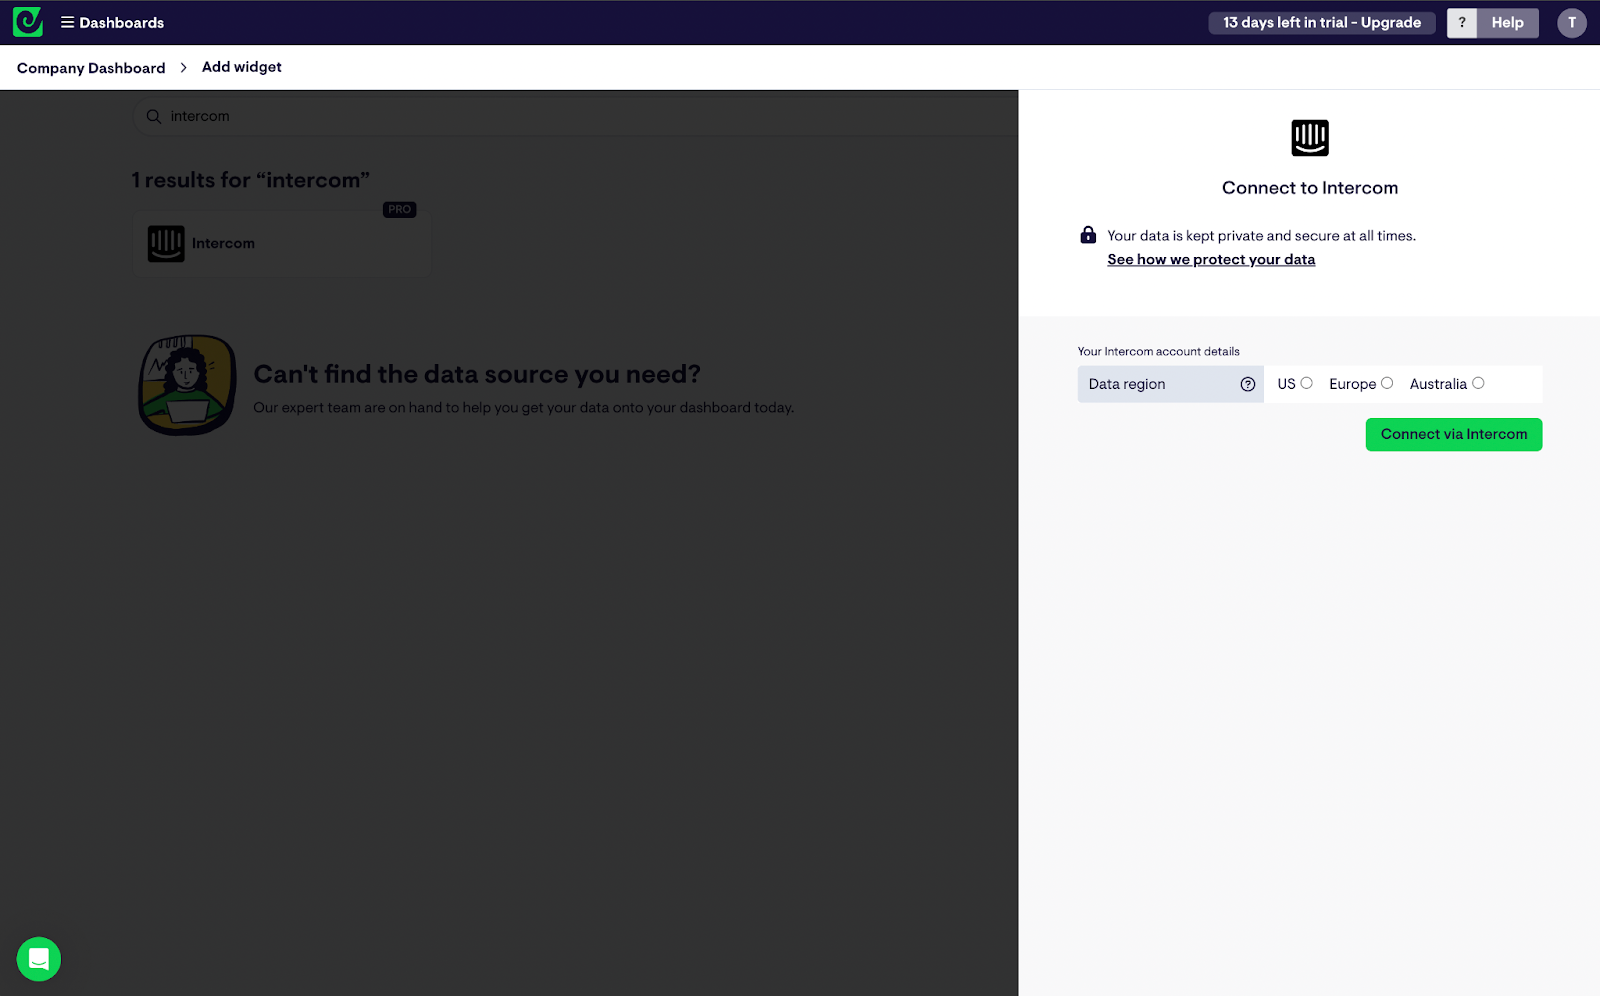
Step 1: Create a Geckoboard account and connect Intercom
Sign up for a 14-day free trial with Geckoboard. To get started, click ‘add widget’ then select Intercom from the list of 90+ data sources.
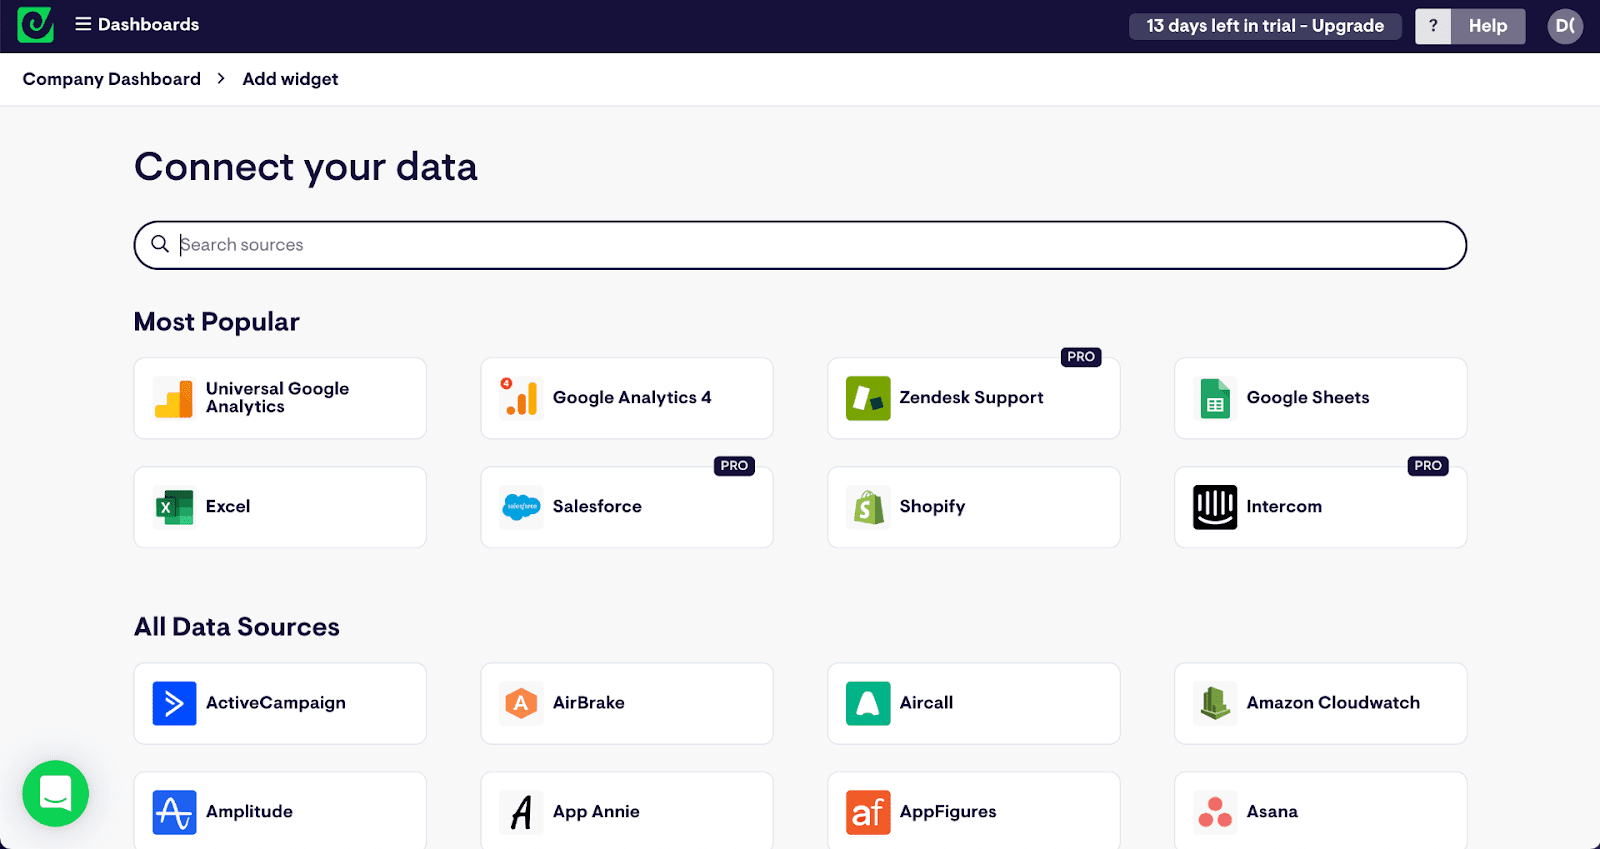
Select any of the widget options, then follow the instructions to connect Geckoboard to your Intercom account.
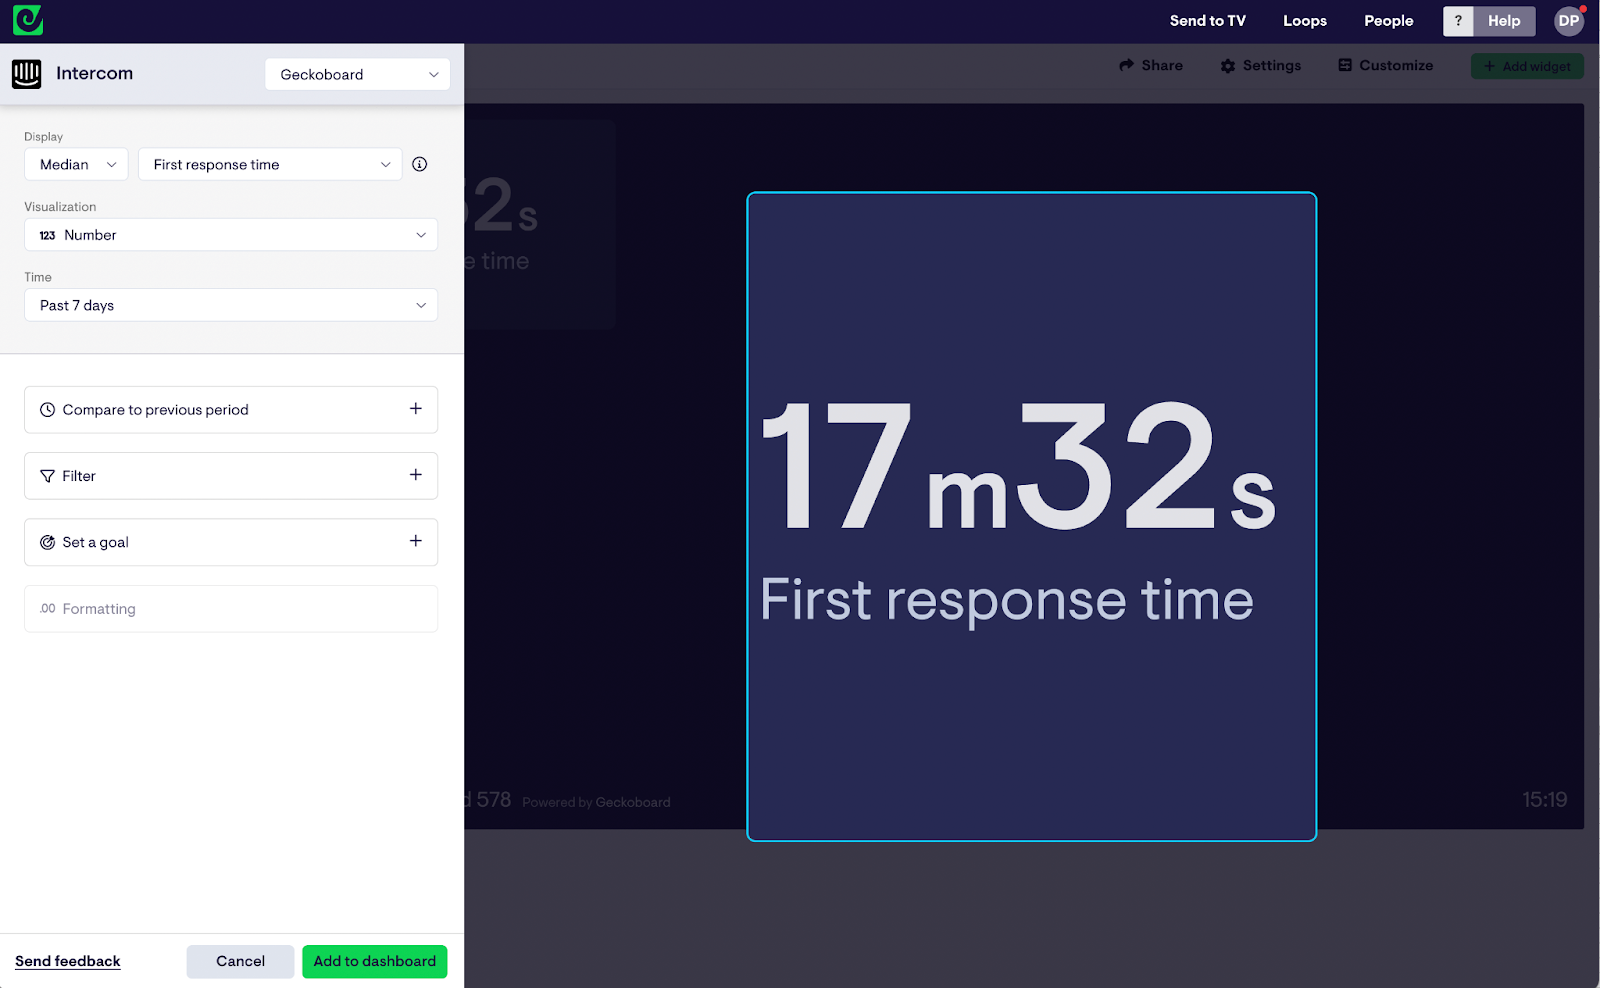
Step 2: Create a widget
Now Geckoboard is connected to Intercom, you can start visualizing your KPIs in the form of widgets. (A widget is simply a data visualization: such as a bar chart, a leaderboard, a gauge or a number.)
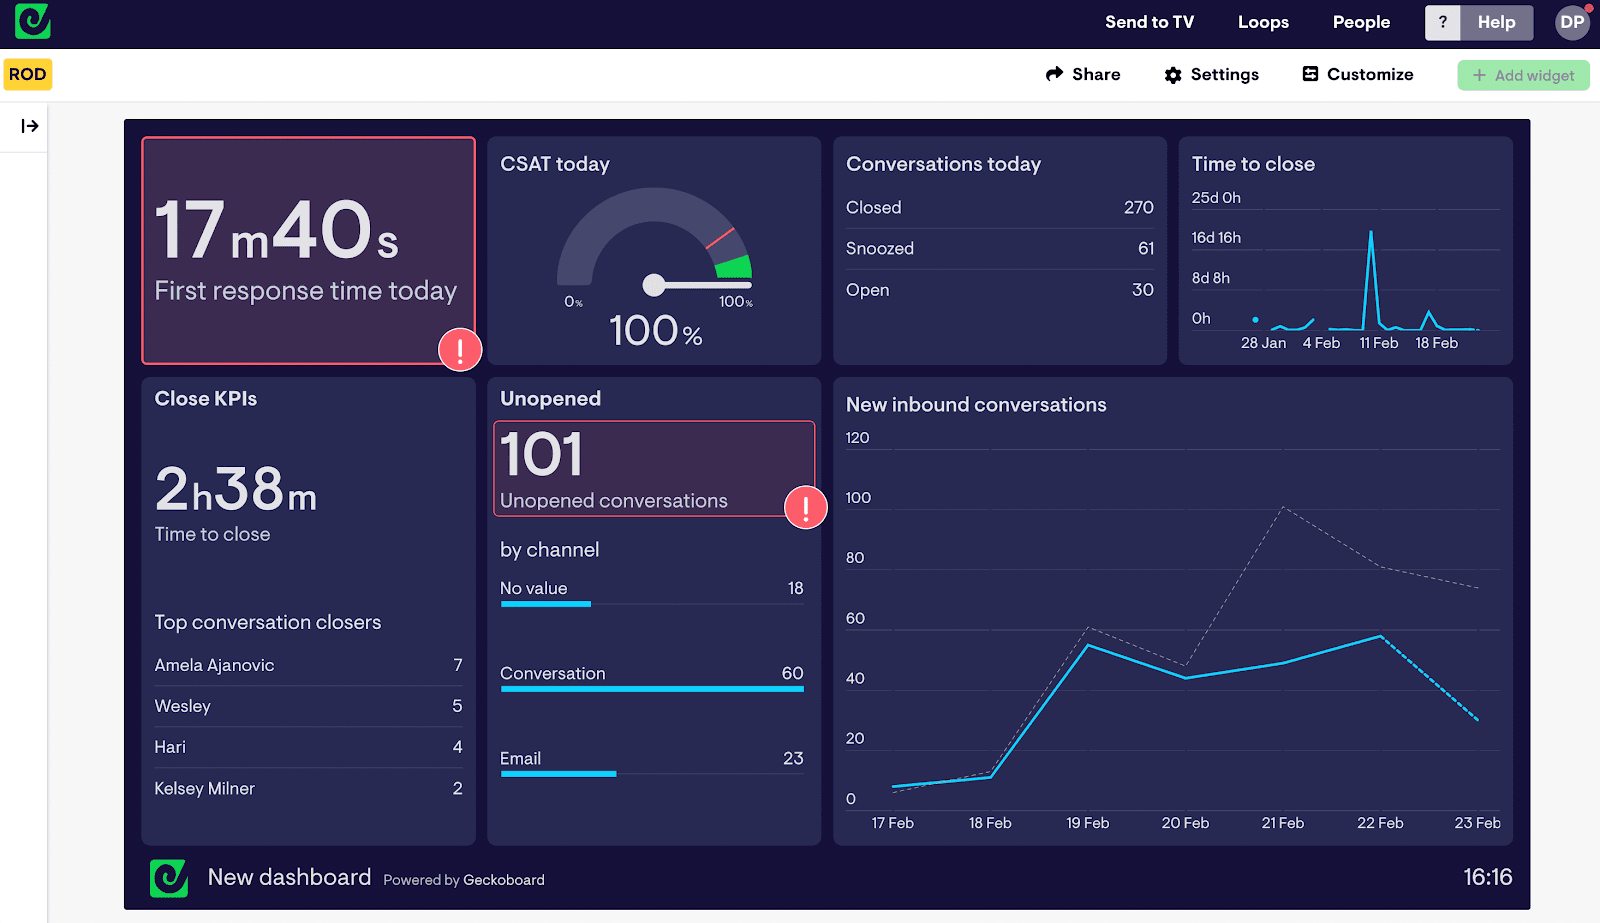
Step 3: Build up a dashboard
Now you’ve created one widget, you can create more to build up your own custom dashboard. Tweak your widgets by resizing them, or grouping related metrics together.
Think carefully about what metrics you want to include on your dashboard, and how to arrange them visually. You should put your most important metrics in the top left hand corner, so your team notices them first.
Step 4: Set up a Slack Snapshot
You can now automate your reporting by setting up regular snapshots of your dashboard to be posted directly to your Slack channel. Or, if you prefer, you can set up these snapshots to be sent via email.
Just click ‘Share’ then select either 'Slack' or 'Email' and follow the instructions.
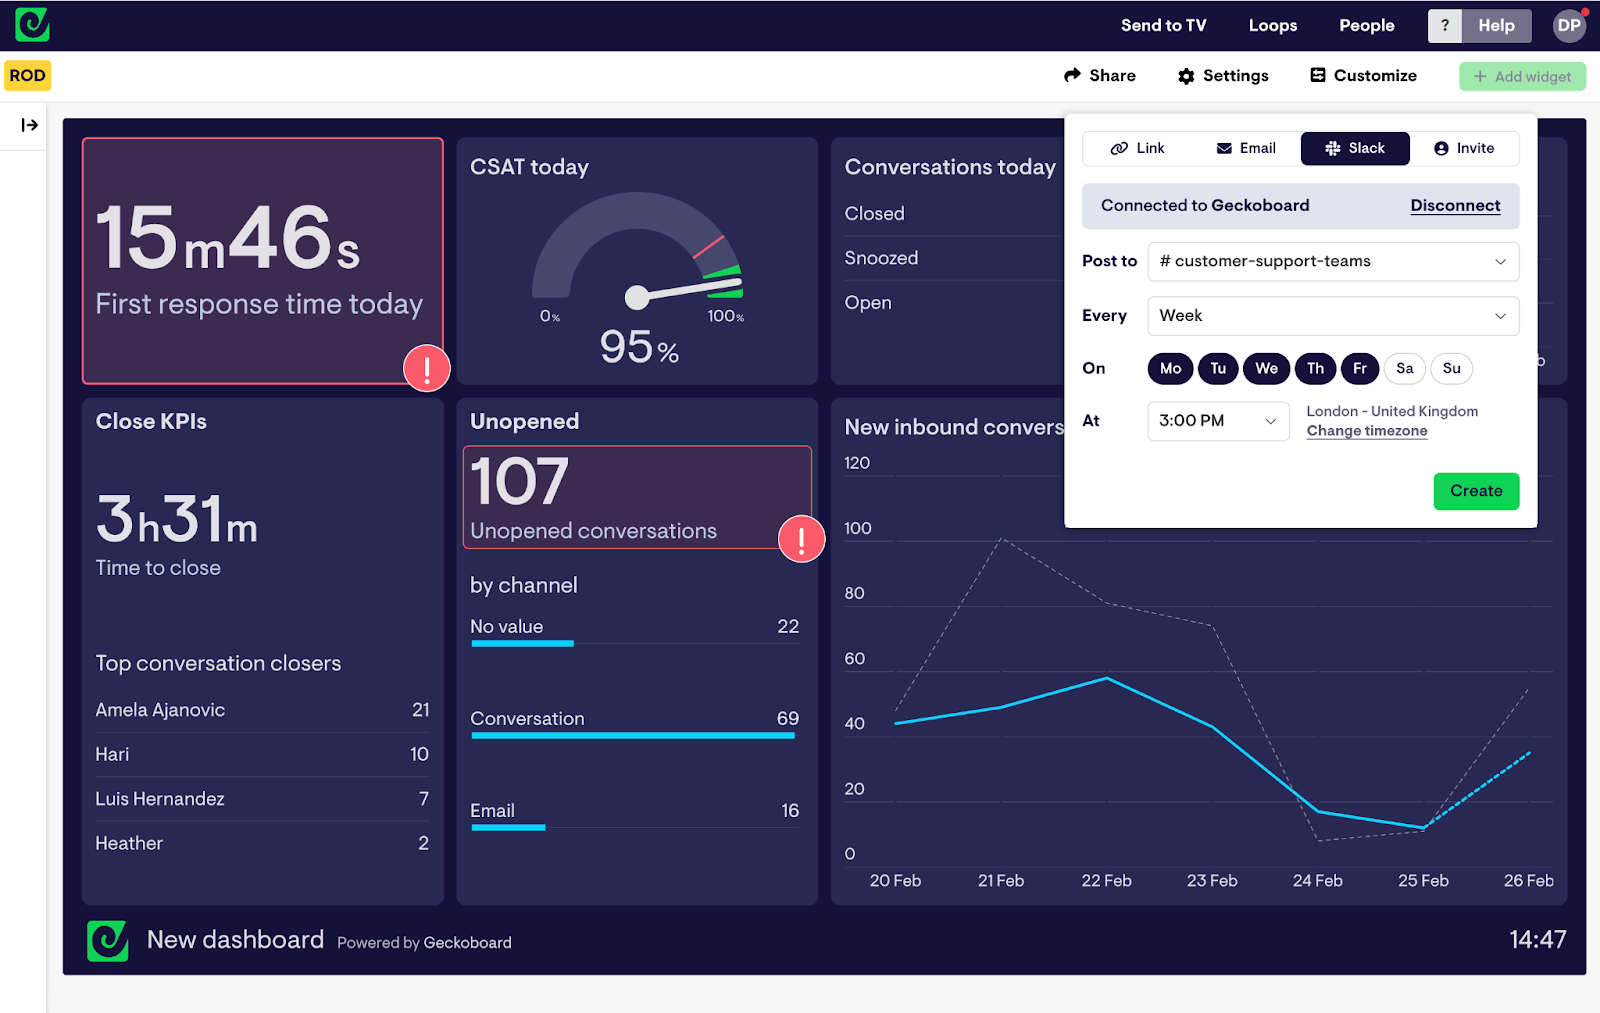
Your dashboard will post to Slack on the days and time of your choosing.
How to Set up Slack notifications and alerts for Intercom?
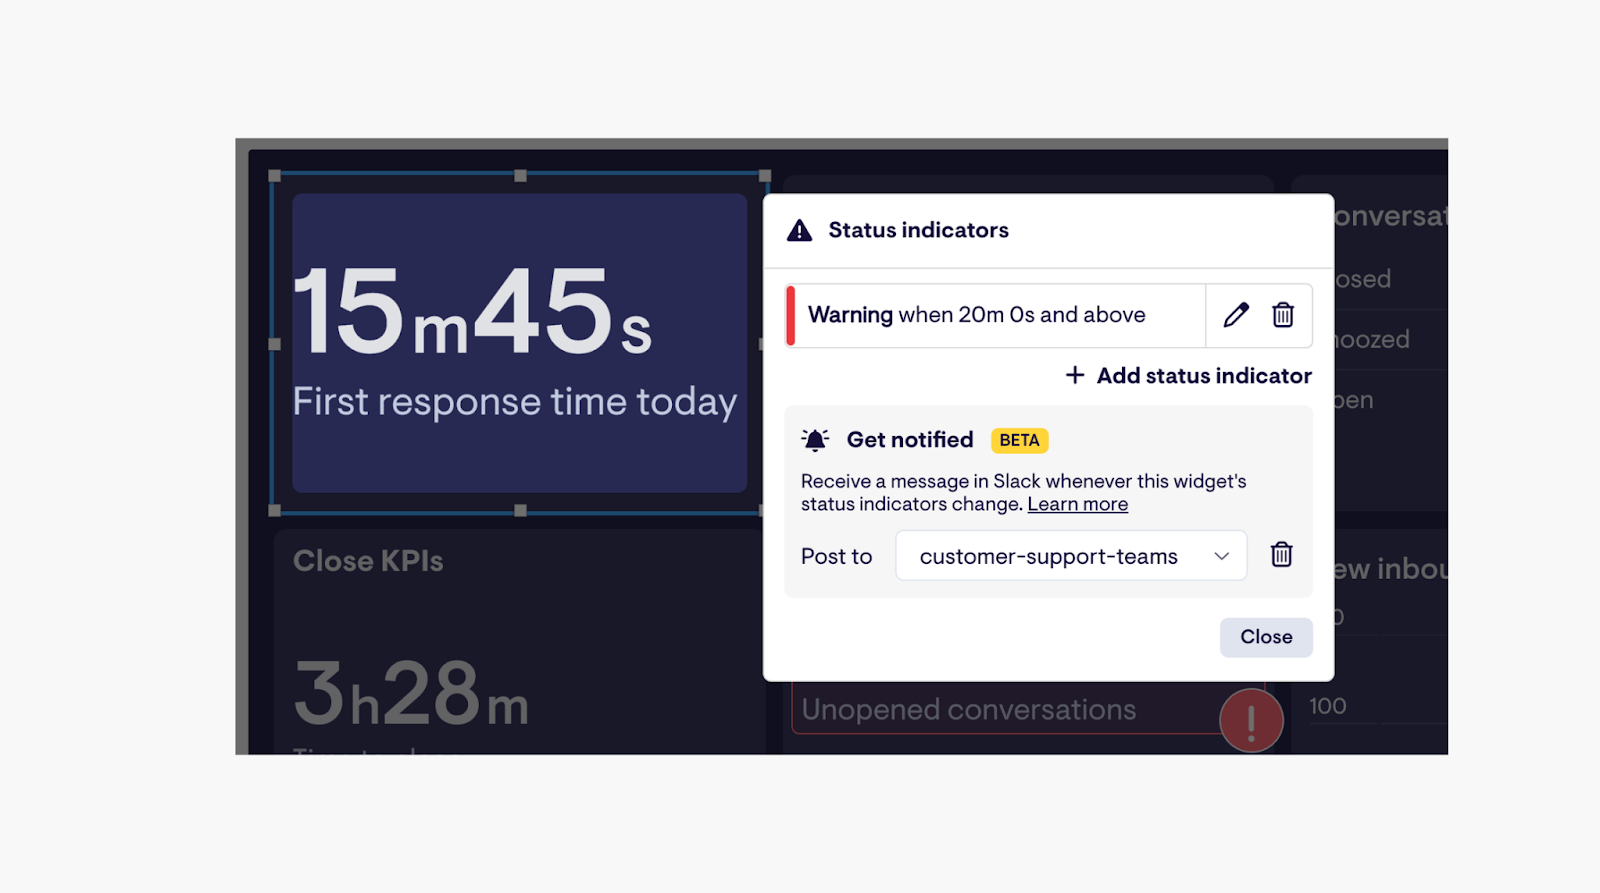
In addition to daily or weekly reports, you may also benefit from KPI notifications, which alert your team as soon as one of your KPIs breaches a set limit.
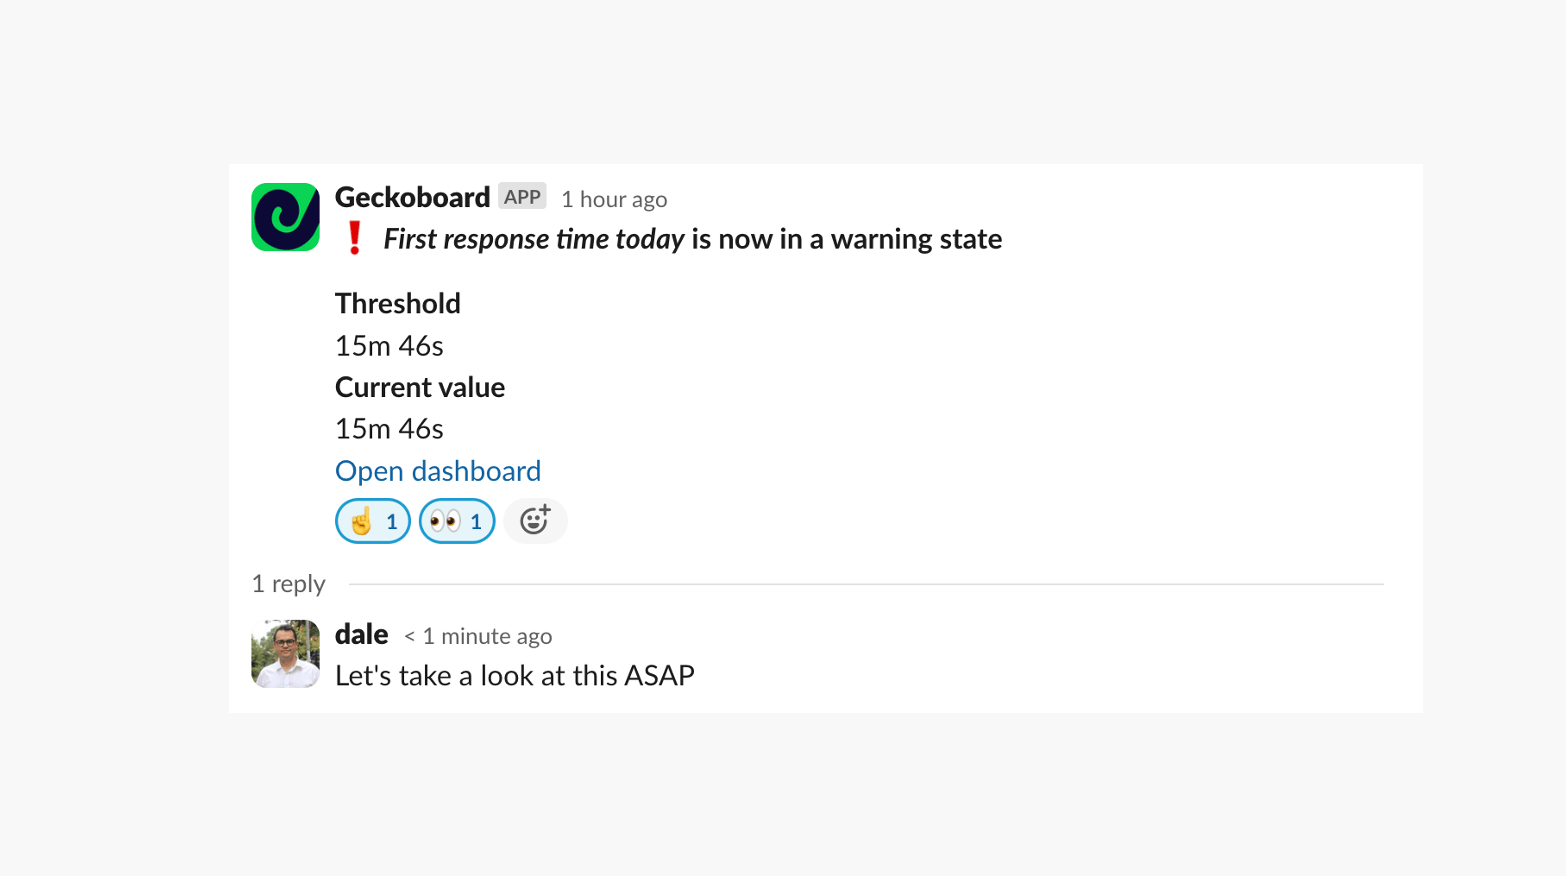
This is particularly helpful if you are looking to promote certain standards, such as keeping First Response Time below a set level, or maintaining a strong Time to Close metric.
To set up a Slack notification, simply add a status indicator to one of your widgets. Here you have the option of being notified in Slack if the status indicator triggers.