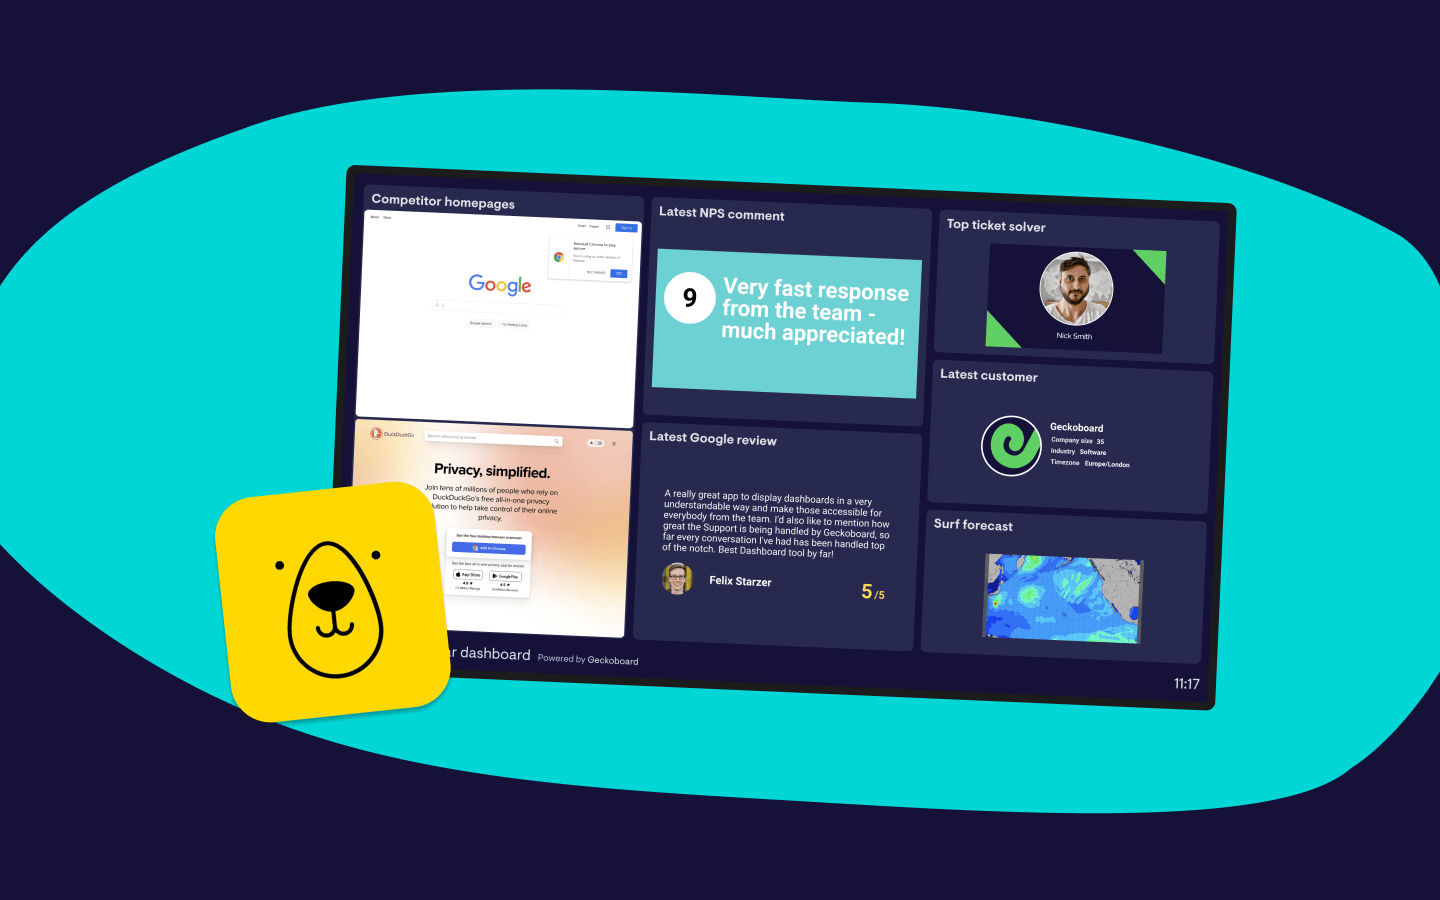
We recently shipped a new Geckoboard integration for Bannerbear.
Why should you care?
Because now you can generate snazzy images and graphics that display instantly on your Geckoboard dashboard. From live weather reports, to more engaging ways to visualize customer feedback, the possibilities are endless.
And the best part is, you can automate the entire process, end-to-end.
What is Bannerbear? Bannerbear lets you create a visual template with simple design tool (you can upload your own design assets too), and then populate it using data from Zapier, Airtable, Google Sheets, forms, or even via their API.
So, rather than designing individual social media images, banner ads or even product mockups by hand, with very little setup you can quickly generate hundreds of variations using information from almost anywhere. Interesting, right?
With Geckoboard’s Bannerbear integration it’s easy to then add these images to a dashboard, opening up a huge range of options for surfacing useful (or fun) information around your organization.
Here are four ways we’ve started to generate images for our dashboards using Bannerbear with some pointers to get you going.
Show recent product reviews
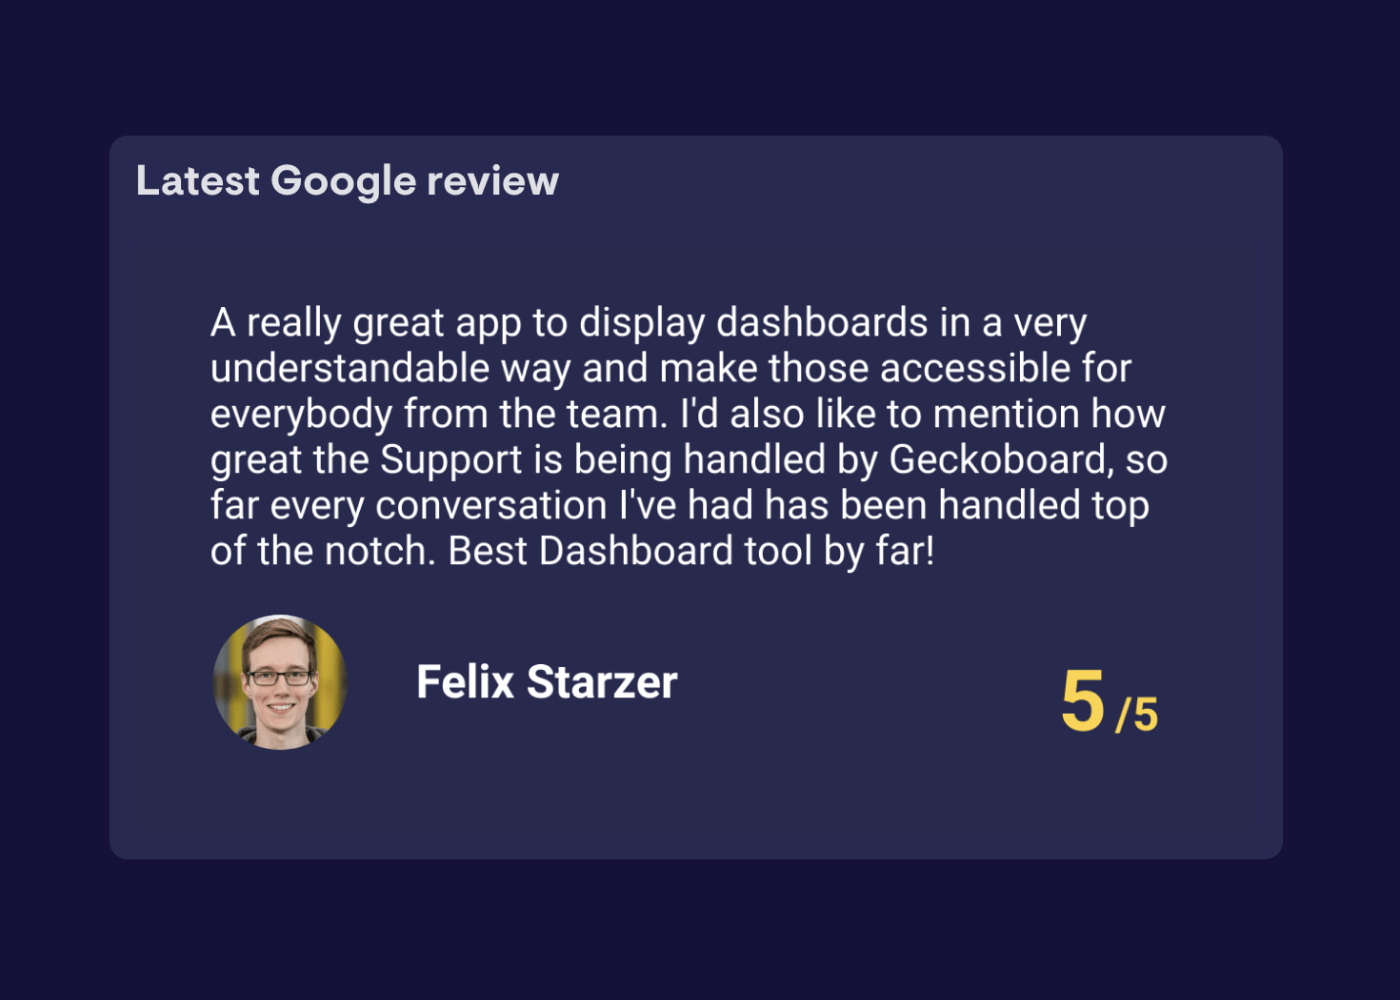
Top businesses place customer feedback at the very heart of their team’s culture and decision making. That’s why many of our customers choose to display live customer feedback via their Geckoboard dashboard.
Now, using Zapier and our new Bannerbear integration, you can automatically import customer feedback graphics, which include eye catching design features (such as customer profile pictures), ensuring feedback gets seen by your team and throughout the organization.
Here’s how.
- Create a template in Bannerbear that includes containers for your review text, review score, and if you like, the reviewer’s image and name
- In Zapier, build a Zap that triggers when a new review comes into the platform of your choice. In this example we’ve used Google reviews, but you can also pull in reviews from G2 Crowd, Trustradius, Feefo, or Facebook pages too.
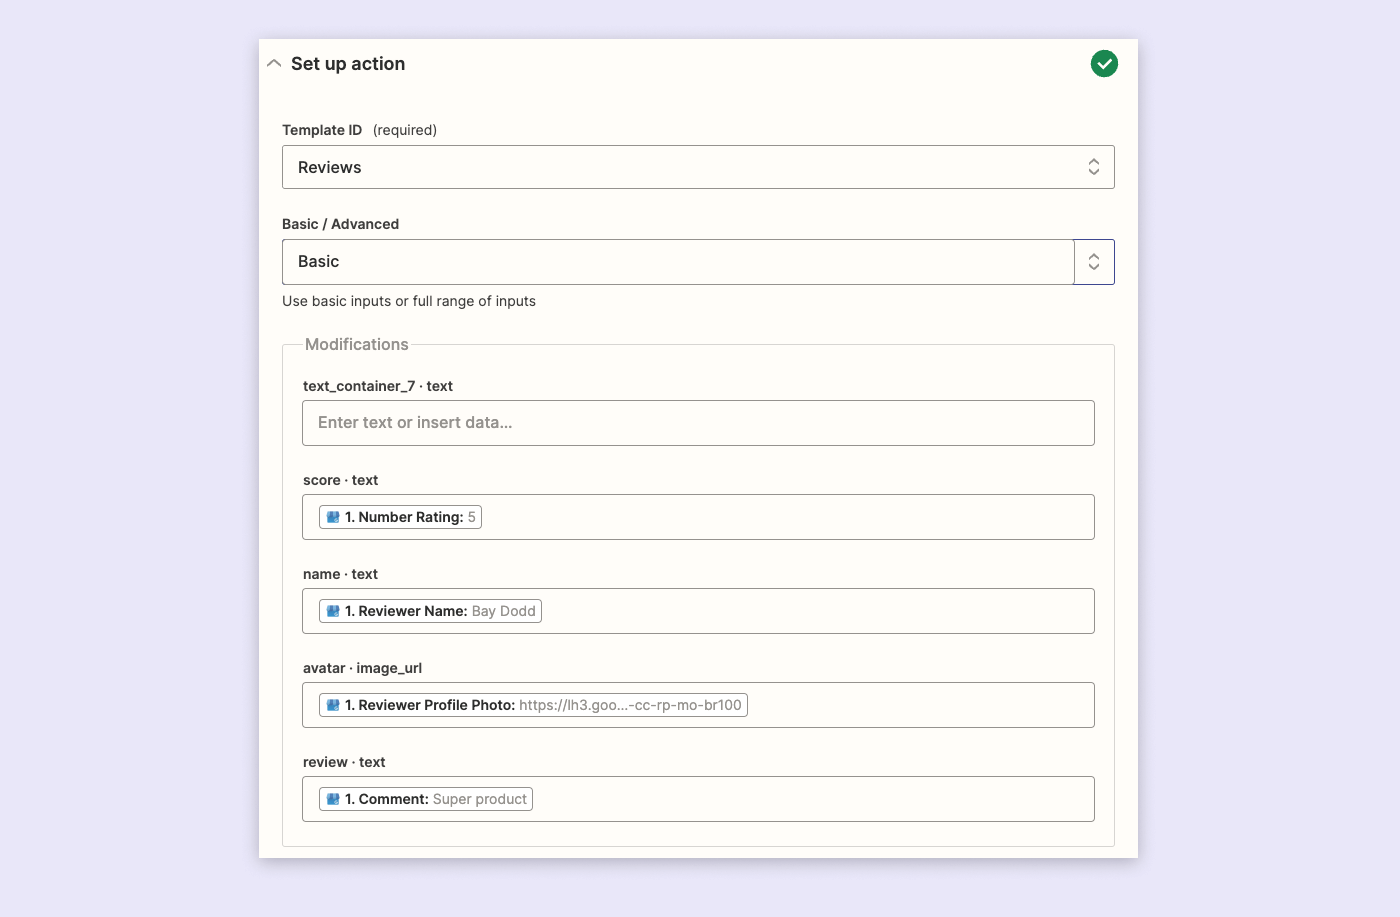
- Still in Zapier, create an action that creates an image based on your trigger. Select your review template, and use Modifications to match the containers in your design to the information pulled from the review platform. [See screenshot below]. ProTip: this step is a lot easier if you name each container appropriately when building your template in Bannerbear!
- Over on your dashboard in Geckoboard (create an account for free here if you don’t have one already), connect the Bannerbear integration, select your review template and add the widget to your dashboard.
Every new review should now trigger your Zap, and display on your dashboard in a matter of seconds. Nice.
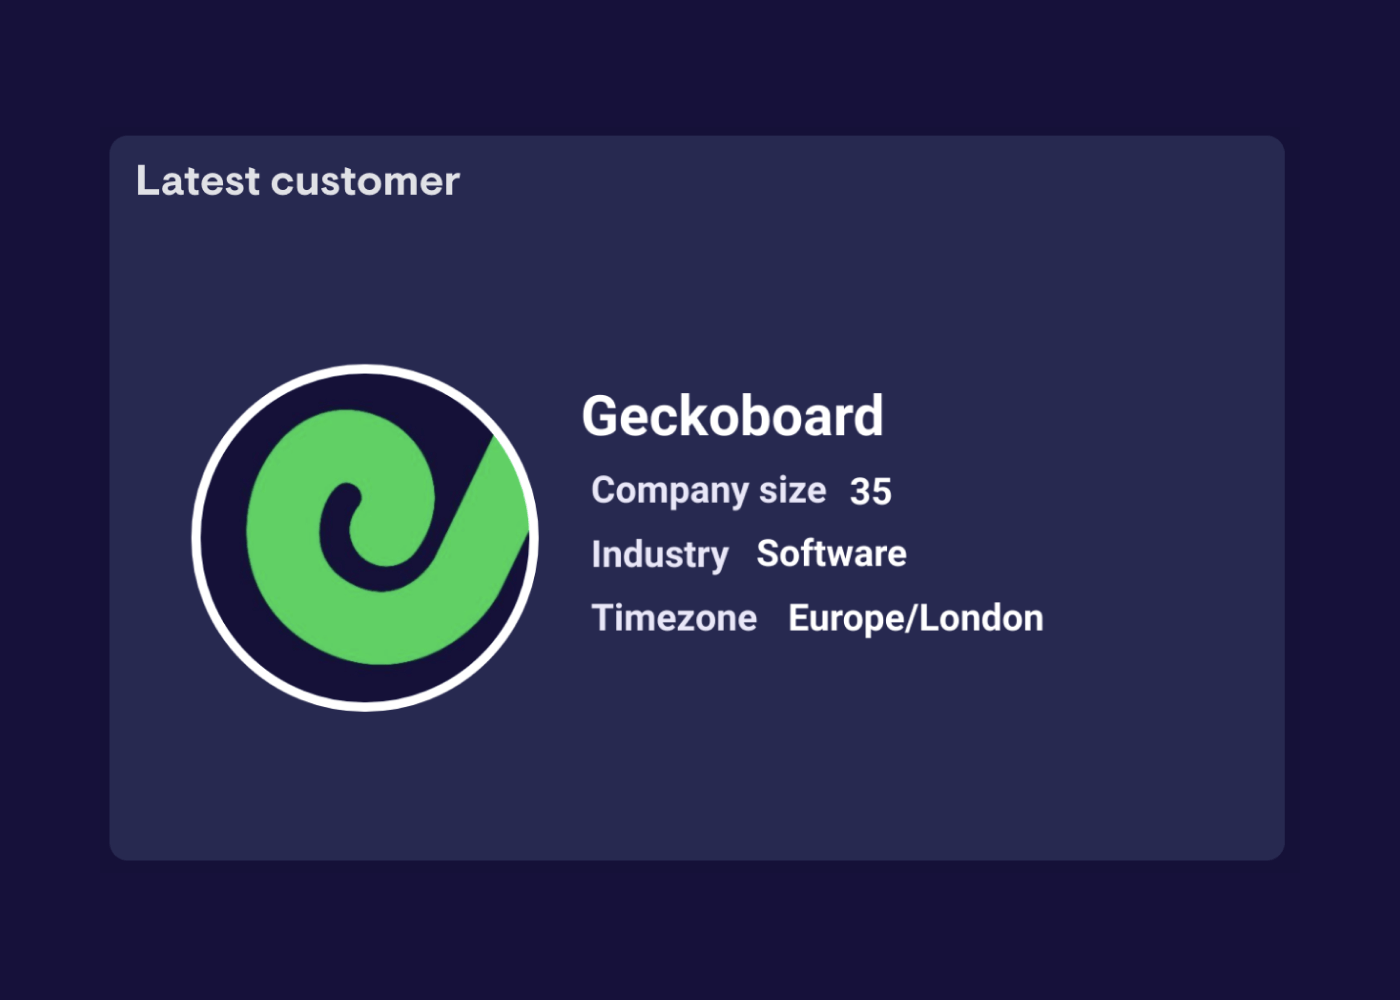
Highlight new customer profiles
Whether you’re an Enterprise sales team, or startup at the beginning of your journey, it’s always exciting to see new customers coming on board. Here’s a visually engaging way to surface some high level information about new customers from your CRM, using Intercom, Clearbit and Zapier.
- Create a template in Bannerbear that includes containers for your customer’s organization name, logo, and high-level information about the company.
- In Zapier, build a Zap that triggers when a Lead converts to a User in Intercom.
- Create an action to ‘find person and/or company’ in Clearbit, using the user’s email address from Intercom. This should return a range of information about the user’s organization from Clearbit’s API.
- Create another action that creates an image in Bannerbear, matching the containers in your design to choice pieces of information pulled from Clearbit.
- Over on your dashboard in Geckoboard, select your ‘New customer’ template and add the widget to your dashboard.
Now your dashboard will give you and your team a quick overview of any new customers who convert.
Surface new content
Dashboards are a great way to share KPIs throughout the organization, but they can be useful for keeping everyone up to speed with other updates too. This example surfaces content from a blog, powered by Airtable, but could easily be adapted to highlight staff birthdays or other milestones.

- Connect Airtable to your Bannerbear account
- Create a template in Bannerbear that includes containers for your headline, name, and image
- Create a base in Airtable with columns that will contain headlines, names and images from your blog posts
- Populate it by copying/pasting information into your base, or use one of Airtable’s Quick import options to import content from Asana, Trello or a calendar.
- In Bannerbear, navigate to your template, select Airtable, add your Base ID and map the fields in your template to your columns in Airtable
- Click ‘Import’ to generate a batch of images based off the information in your table.
- In Geckoboard, pick a specific image generated from the template.
- To show the ‘latest’ image, add a checkbox column labeled ‘imported’ in Airtable to ignore rows that have already been imported. When a new row (blog post) is added in Airtable, hit ‘Import’ in Bannerbear, and set your widget in Geckoboard to show the latest image.
Full instructions for how to use Airtable with Bannerbear can be found here.
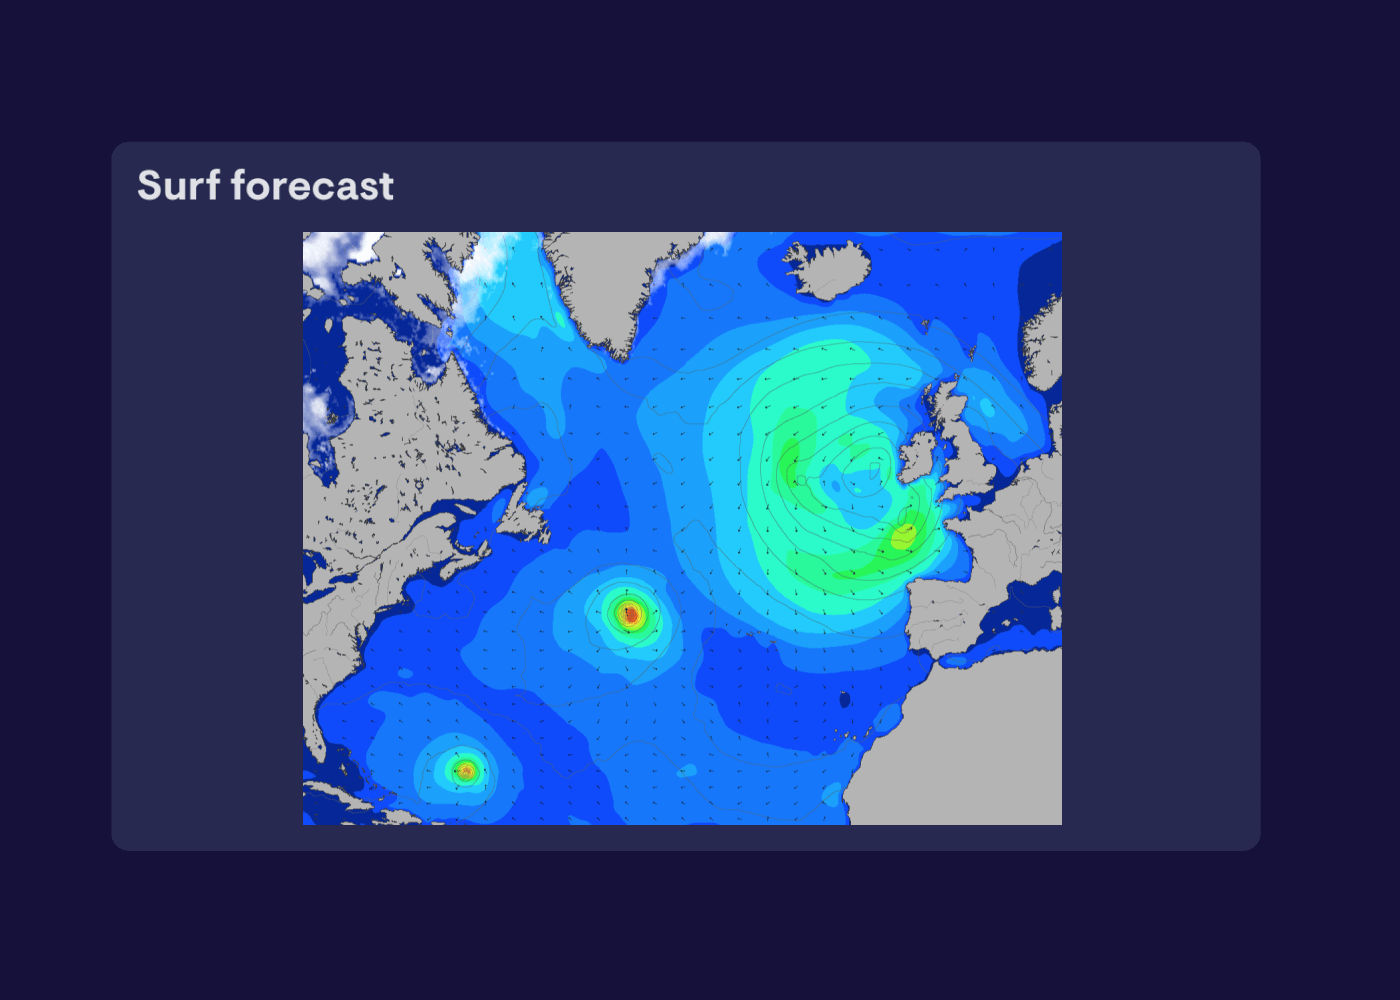
Display regular screen grabs from competitor web pages, public service sites, or any other website you can think of…
Bannerbear has the ability to take screenshots of web pages, using their API or Zapier. The possibilities are endless with this one. In the example we’ve used Zapier and Bannerbear to pull through a daily screenshot of the surf forecast for the South West of the UK. Essential data for helping me decide if I should finish work early to go catch some waves.
- In Bannerbear create a simple template containing an image
- In Zapier, set up a ‘Schedule’ trigger to trigger every day (or as often as you need)
- Add a ‘Create screenshot in Bannerbear’ action
- Under ‘Set up action’, add the website you want to screenshot and the dimensions of the image you want to generate. In this case I’m using the charts available over at Magic Seaweed.
- Add another action to ‘Create image in Bannerbear’. In the setup, select your basic template and map the screenshot url from the previous action to the image field in your template
- Over in Geckoboard, create a Bannerbear widget and select your template and choose to show the latest image.
Your dashboard will now show screenshots of your chosen URL on the schedule you chose. Perfect for keeping one eye on your competitor’s homepage messaging, public transport in your city, local air quality and more.
For more information on how to use the integration, check out our documentation.
