Aircall is one of the most popular cloud phone systems – used by sales teams and customer service teams alike. It also provides excellent reporting and analytics features, so managers can stay on top of KPIs and Service Level Agreements.
However, as any good contact center manager will know, the situation on any given day can change fast – it’s not enough for one person to be on top of the team’s performance metrics. Businesses perform best when the entire team knows what their KPIs are, and how they are performing against them.
This is why a real-time TV dashboard (or wallboard) can be transformational in building a data-driven culture. By displaying real-time Aircall metrics on a TV, you can support your team to hit targets, and react fast to sudden changes.
What are the benefits of displaying Aircall data on a TV?
There are several reasons why you might display your Aircall data on a TV wallboard, where everyone can see it.
- Sudden changes: Many Aircall metrics require urgent attention – like a sudden build up of calls, or a rise in Average Wait Time. A TV dashboard will make sure everyone is aware when key numbers change, and who’s available to help.
- Data-driven culture: Exposing your reps and agents to real-time metrics will help them develop a deeper understanding of performance data, and become more confident taking action to improve service levels.
- Friendly competition: Visualizing performance metrics helps to motivate teams and individuals, keeping everyone accountable and focused on the metrics that matter.
Step-by step: Building a TV dashboard for Aircall
Geckoboard is the perfect TV dashboard solution because it:
- connects to Aircall, and supports real-time data refresh
- connects to other data sources you may wish to display such as Pipedrive, Zendesk, Salesforce and Hubspot
- is optimized for TV - which means it can indefinitely be displayed in full screen, can be understood at a distance, and can be updated remotely.
Step 1: Sign up to Geckoboard
You’ll have full access to all Geckoboard features during your 14-day free trial – and there are no credit details required.
Step 2: Connect Aircall
To begin, select ‘add widget’ then choose Aircall.
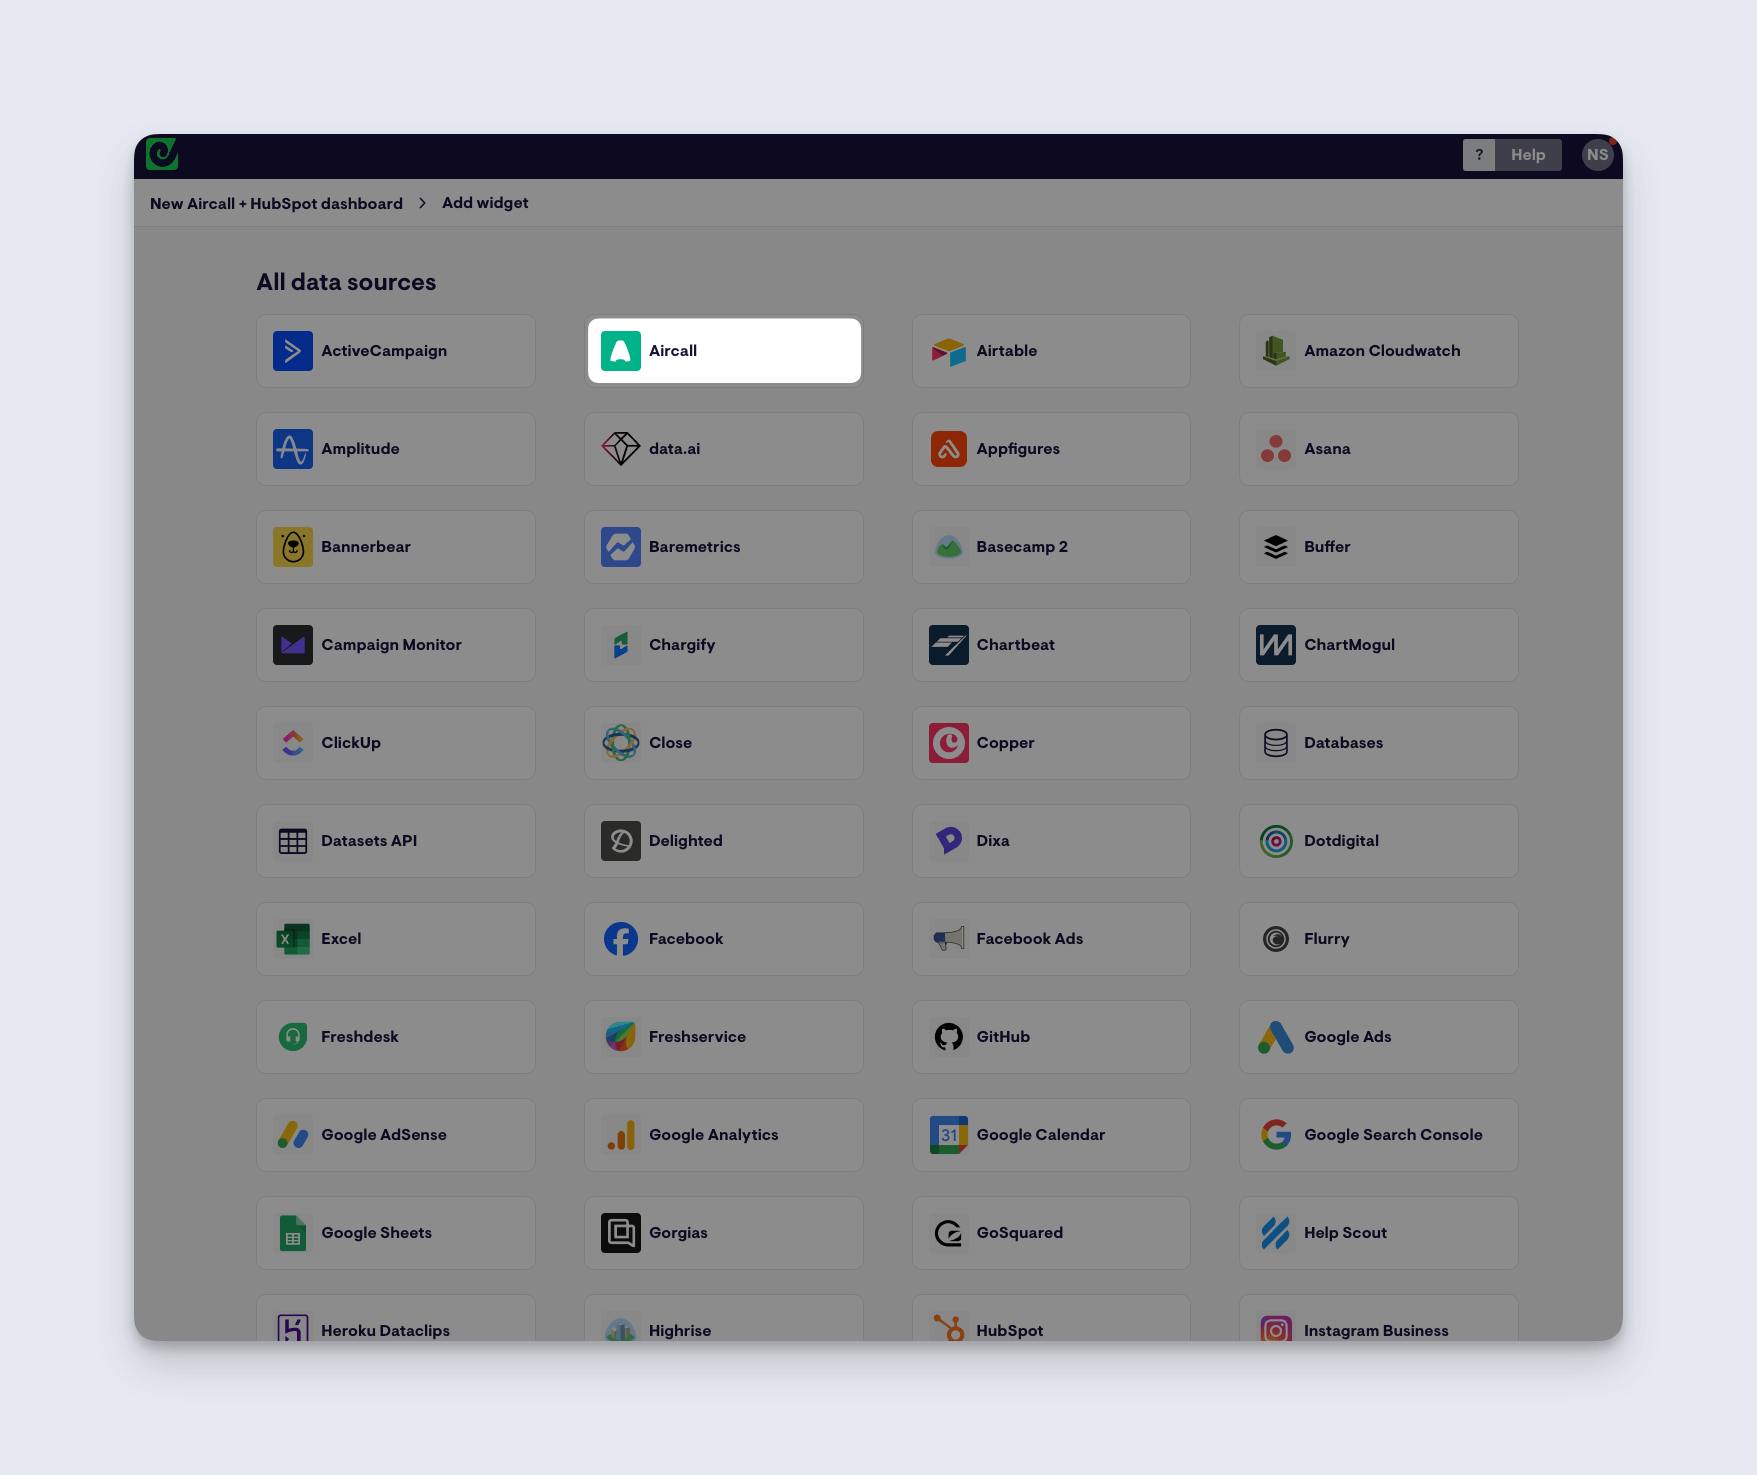
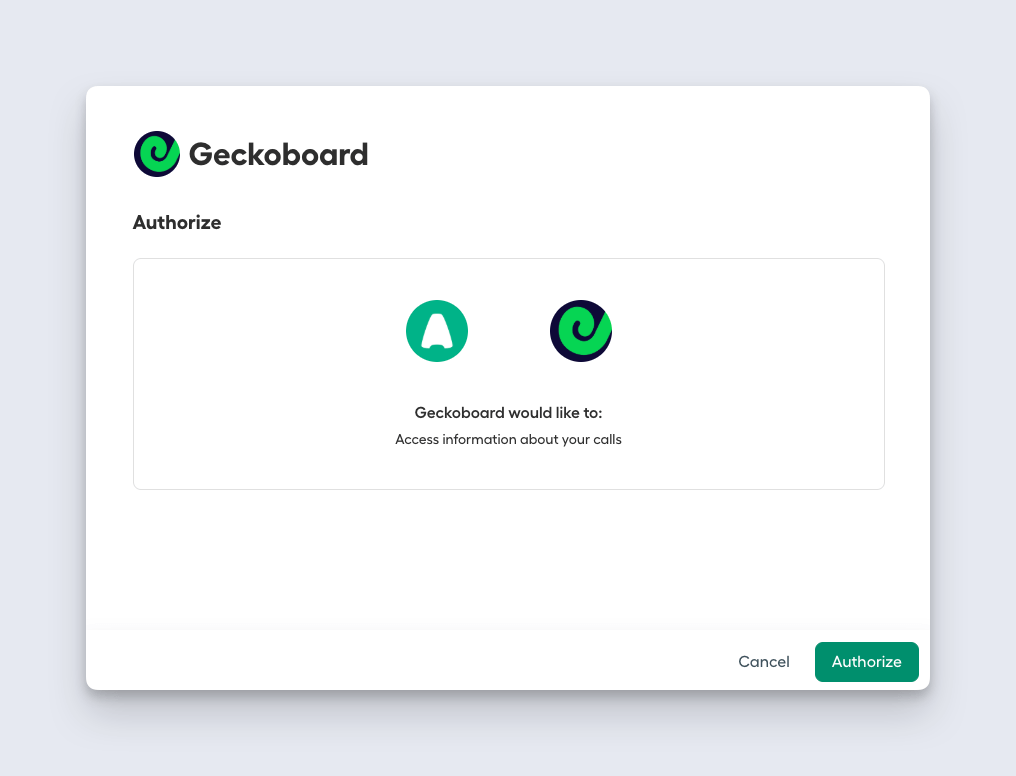
You can select any of the widget options to get started, then follow the instructions to connect Geckoboard to your Aircall account.
Step 3: Create a widget
Now you’ve connected Aircall, you can start building widgets. (A widget is a data visualization: such as a line chart, a leaderboard, a gauge or a number.)
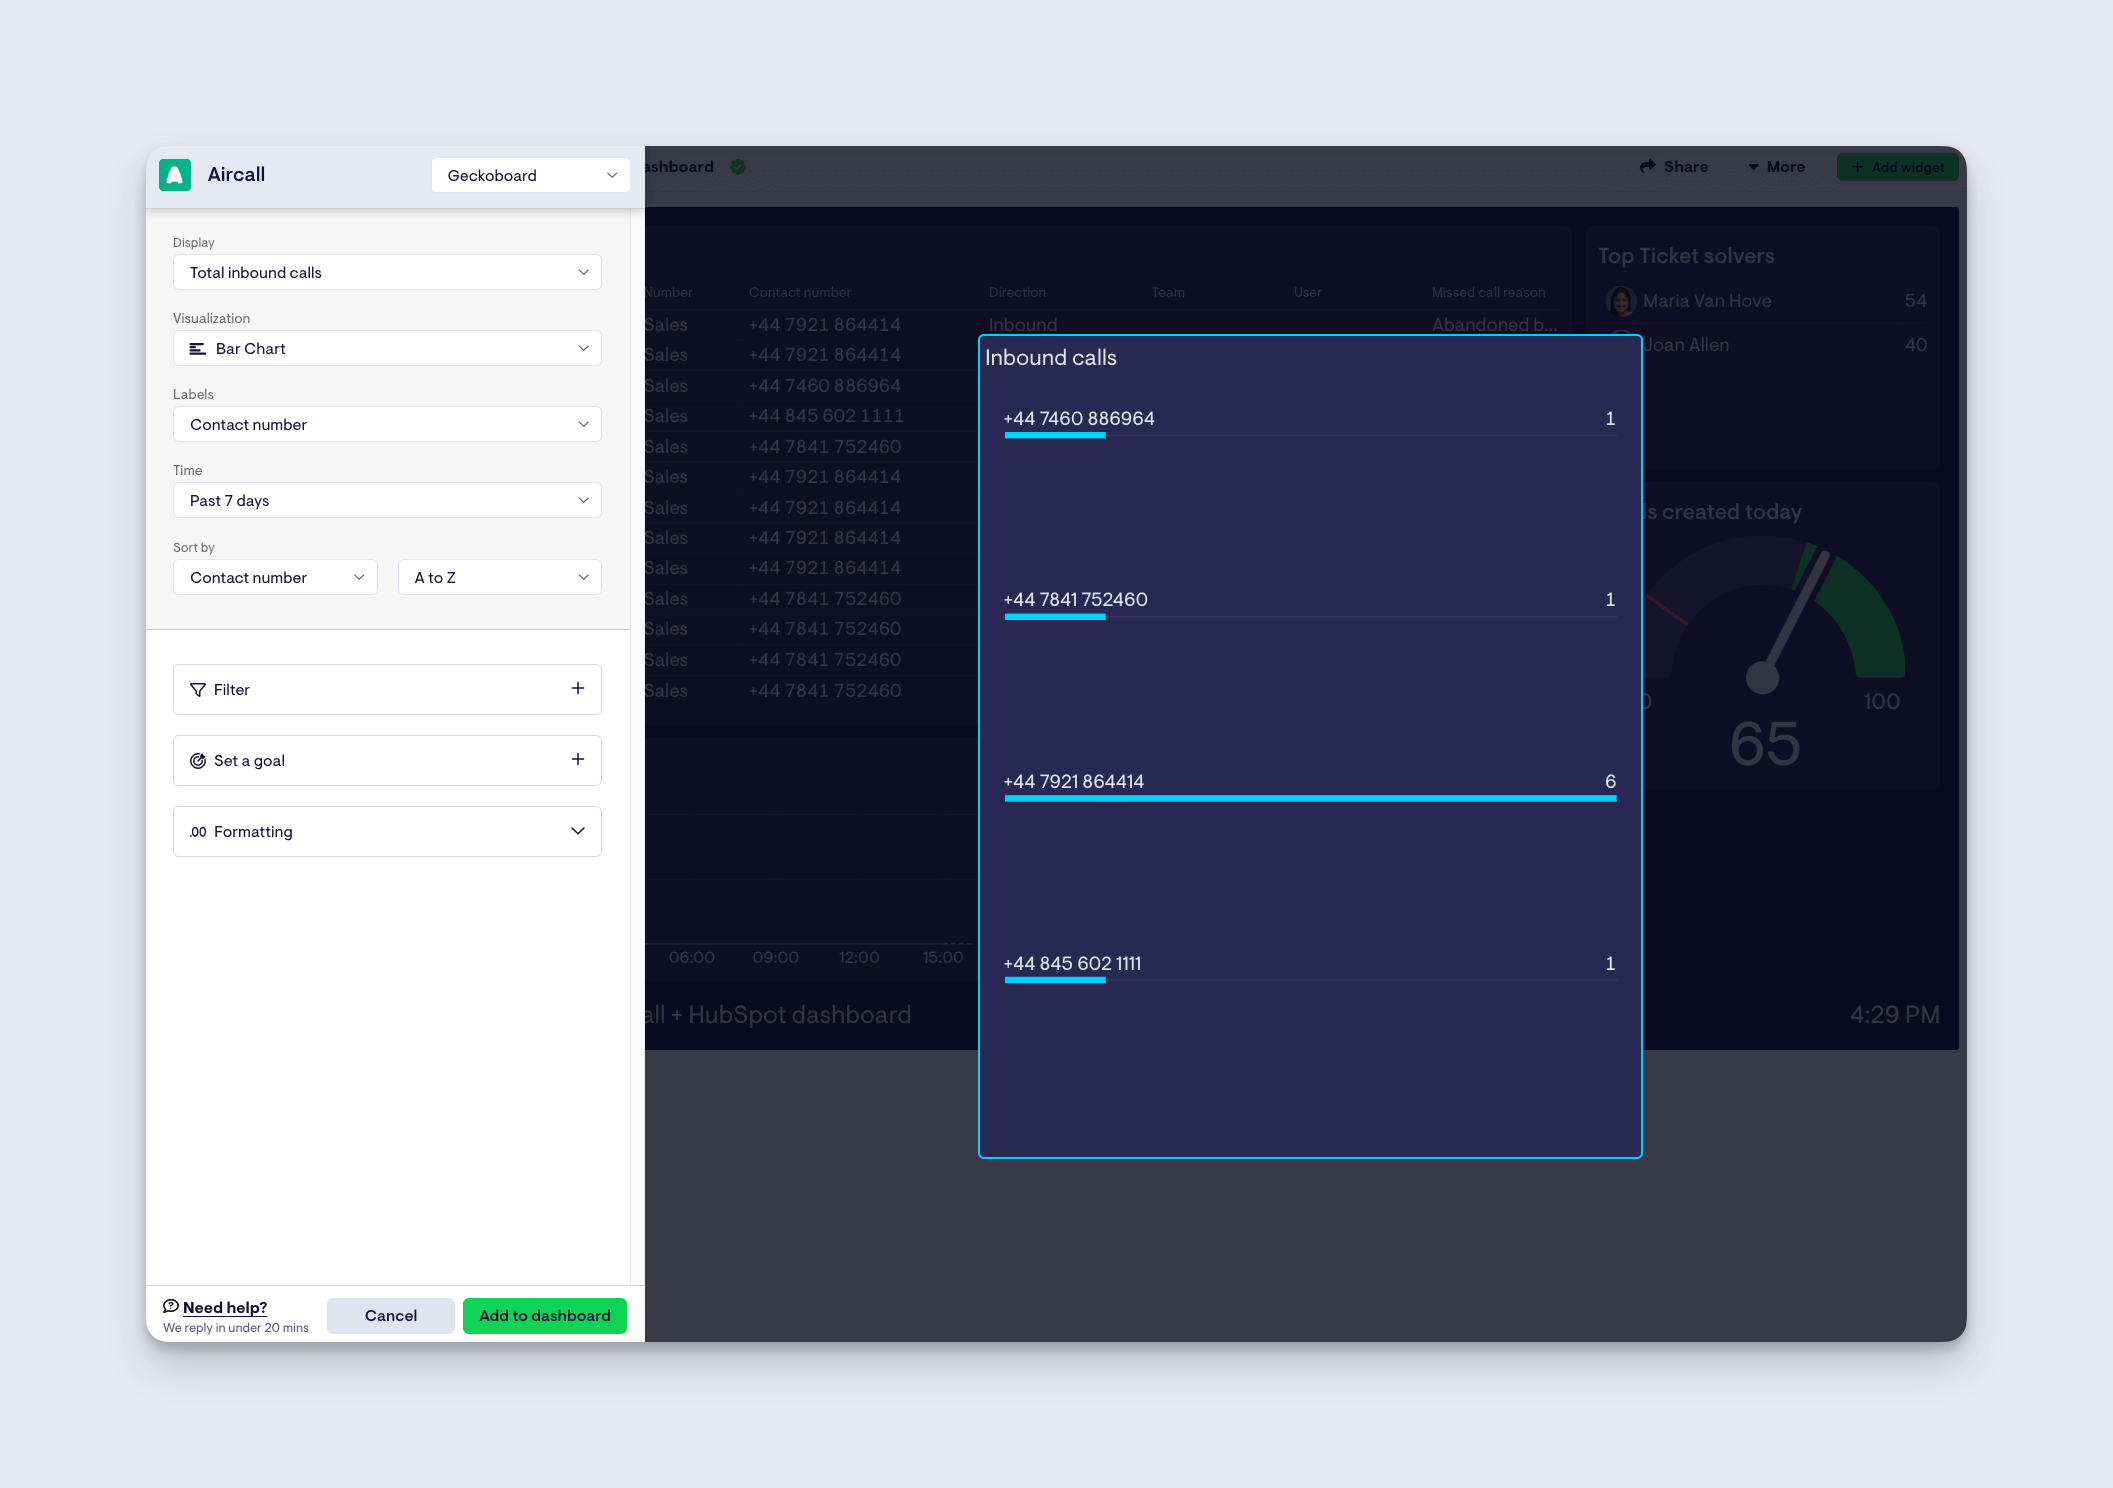
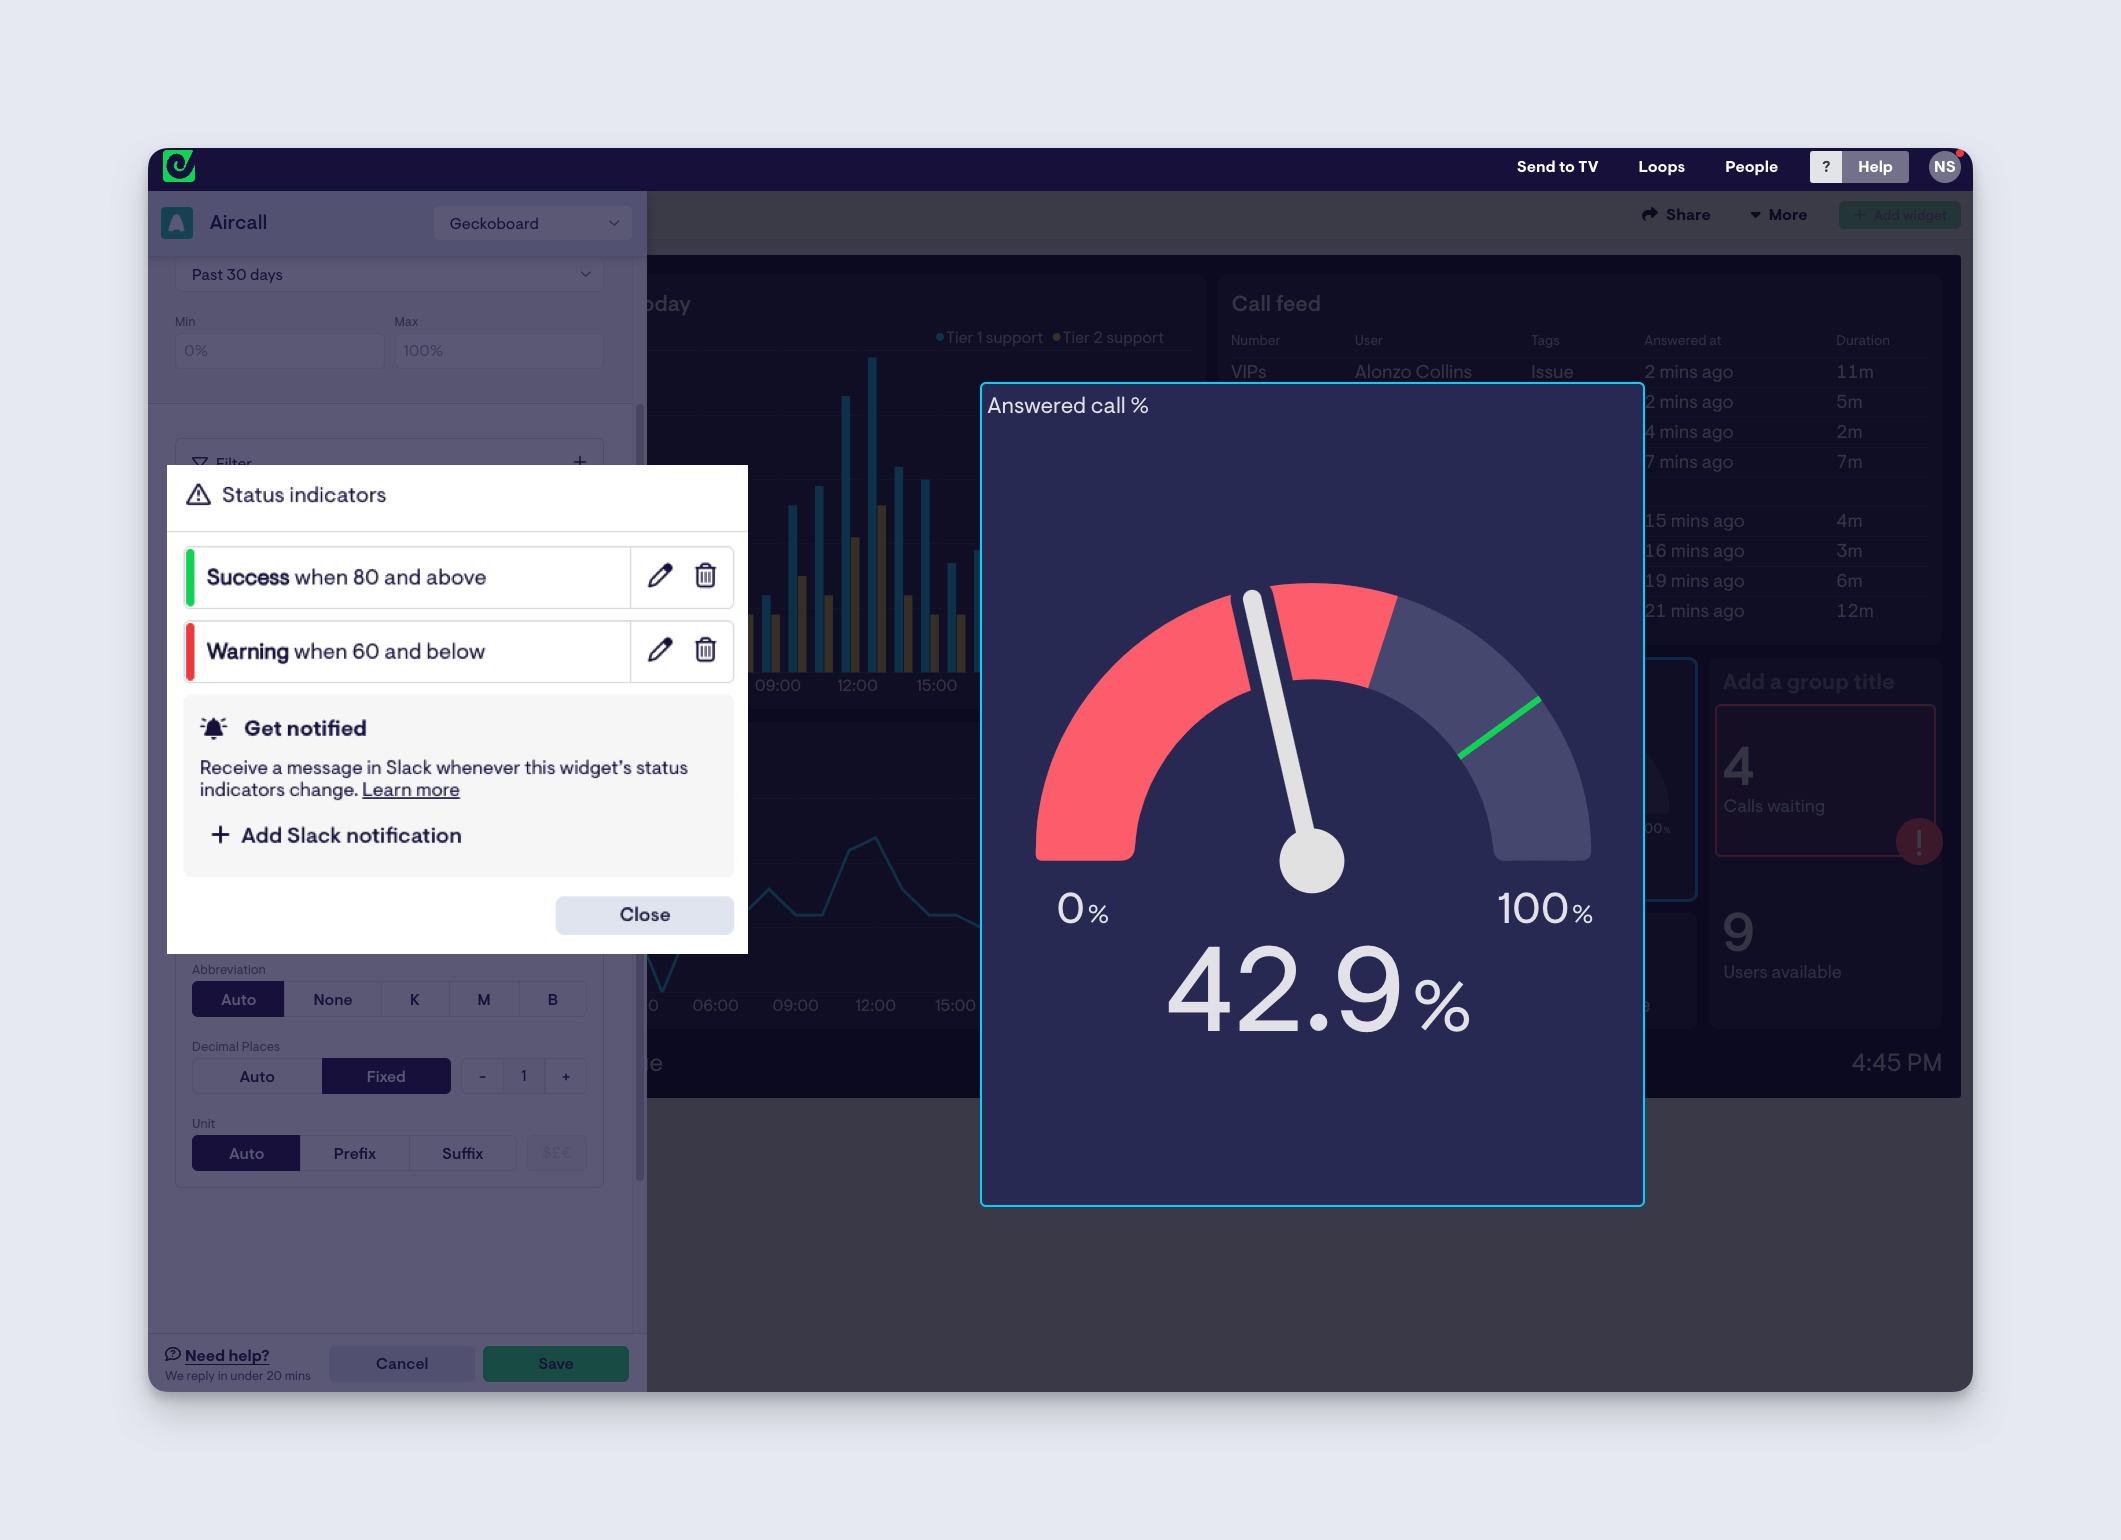
You can choose to change the visualization type or make your widget even more useful by adding goals and status indicators. This helps your team better understand if a metric is good or bad, or if they need to take action.
Step 4: Complete your dashboard
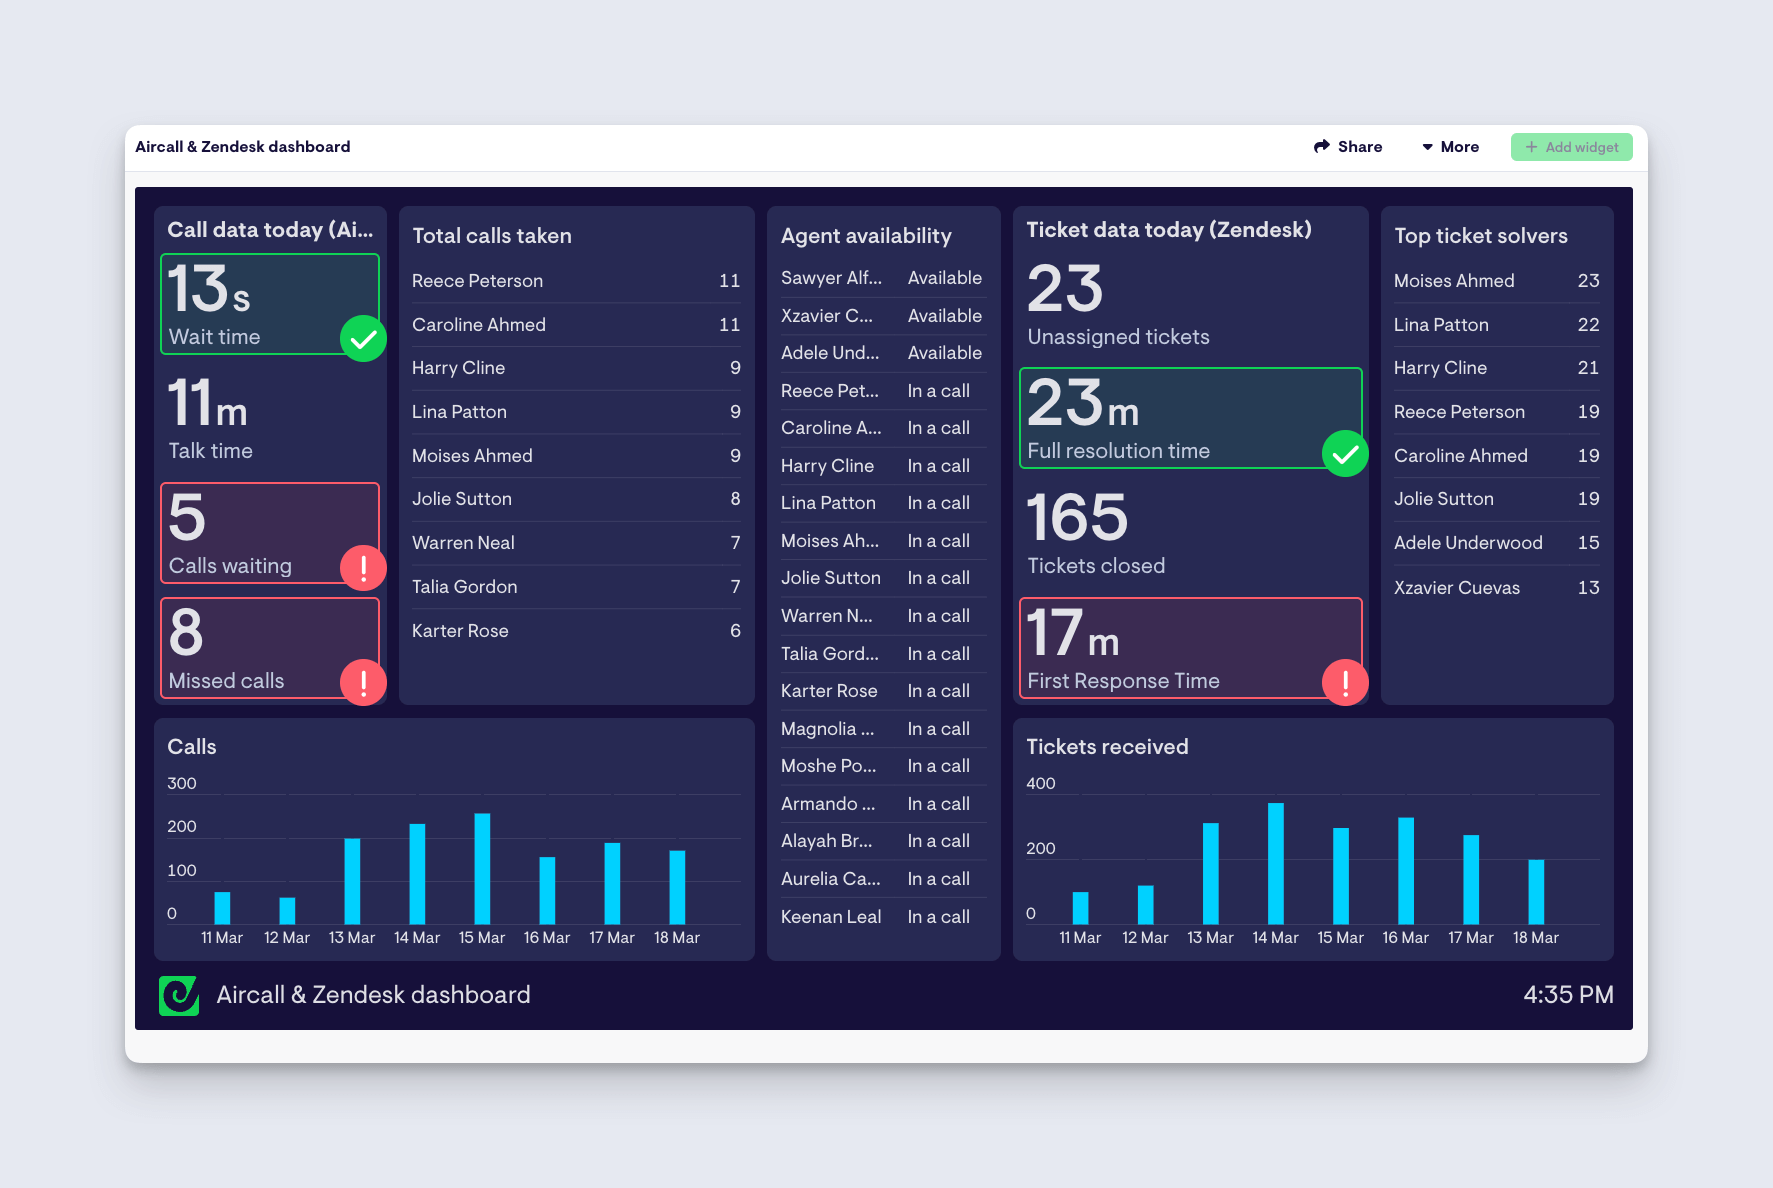
Now you know how to create widgets, you can build up your dashboard. Create the perfect dashboard design by arranging your widgets in a way that makes most sense to you and your team. Generally speaking, you should put your most important metrics in the top left hand corner, so your team notices them first.
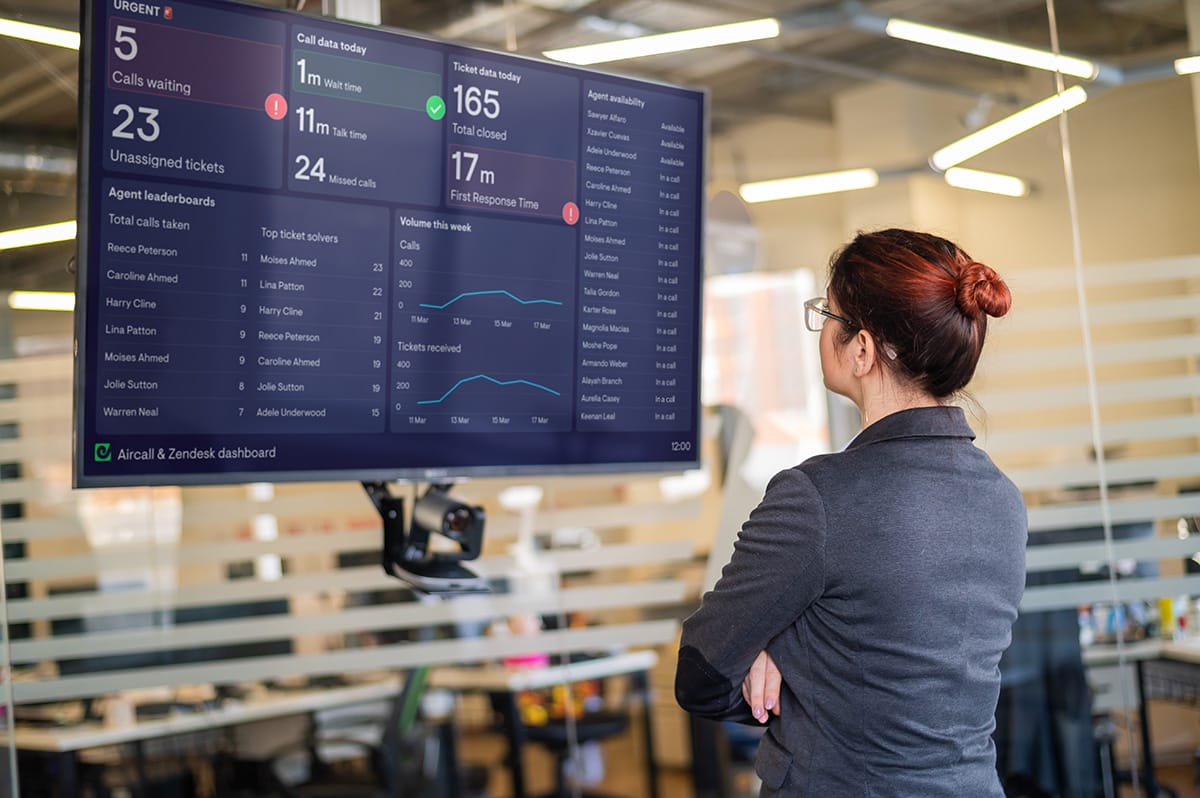
You can also connect other data sources to create dashboards that visualize all your most important metrics from across different platforms. In the dashboard example below, we’re visualizing real-time data from both Aircall and Zendesk Support.
Step 5: Select the right hardware for your TV dashboard
In order to display your Intercom dashboard on a TV, you will need the following hardware:
- A TV – any HD TV screen should work. Alternatively, you could use a computer monitor but these are likely to be smaller and more expensive.
- A small computer – this will be more reliable than using a smart TV. By choosing a small computer it makes it easy to store the device discreetly behind the TV. We recommend a PC stick or Raspberry Pi, which are small and inexpensive.
- A HDMI lead to connect your screen to your computer.
Take a look at our complete guide to selecting the best TV dashboard hardware. (This includes why we don’t recommend using a Smart TV, Amazon Firestick or casting device for your TV dashboard.)
Step 6: Setting up your TV dashboard
Once you have your hardware ready, it’s time to set up your TV dashboard.
Positioning your TV
You should carefully position your dashboard based on who needs to see it. They should be able to read it (at a glance) from where they are working.
Kiosk mode
We highly recommend you set up your computer device in kiosk mode. Kiosk mode configures the device so that it runs a single application when it’s turned on – this means it will always open on your dashboard, every time the device boots up.
We’ve created some step by step guides to setting up Windows devices and Raspberry Pi in Kiosk mode.
Step 7: Connect Geckoboard
Using a different computer, log in to Geckoboard and select ‘Send to TV’. here you can pair your TV to your dashboard.
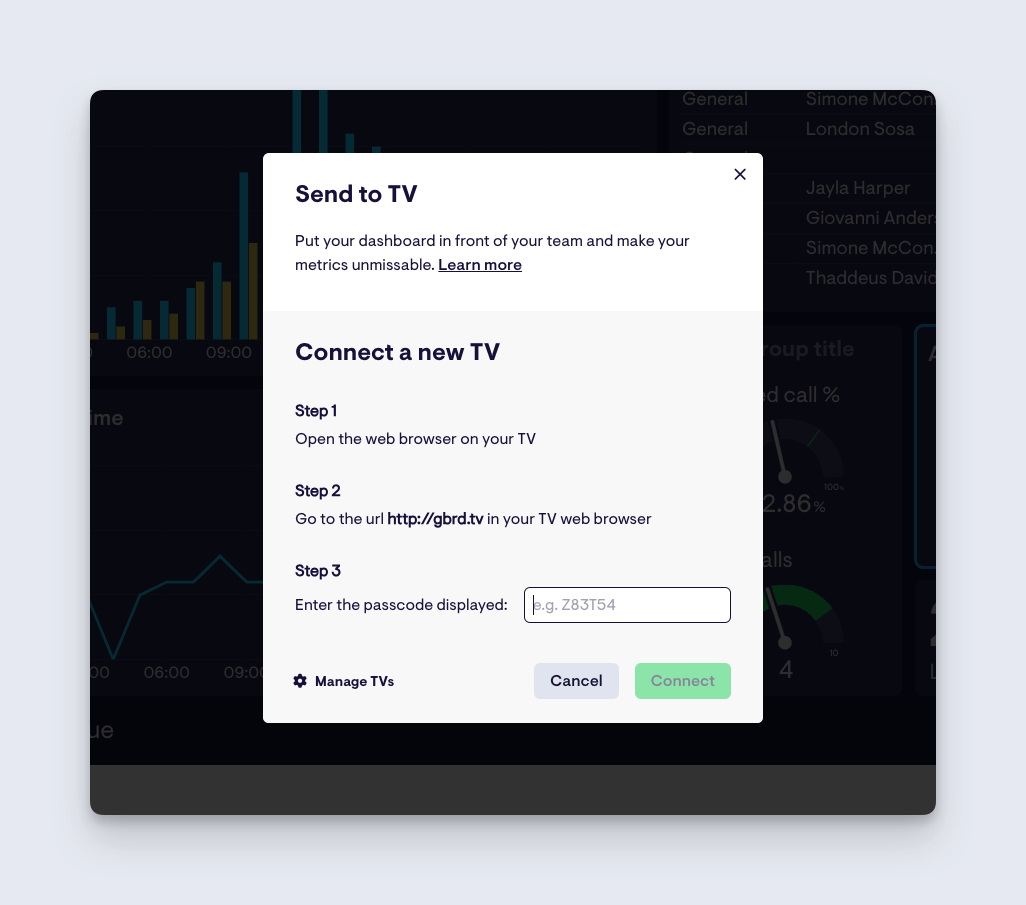
This is where you can manage different TV connections, connect a screen using a short URL and passcode, and even choose several dashboards to be displayed on a loop.
We hope you found this guide useful. Click here to start your free trial with Geckoboard and create dashboards for Aircall and over 90 other different data sources.
