
If you use Zendesk, you may already know how to use triggers to improve different aspects of your workflow. But did you also know using triggers can also massively expand the number of metrics and KPIs you can track?
Triggers are a great way to improve your Zendesk reporting by surfacing custom metrics that are particularly granular or complex.
In Zendesk, Triggers are event-based system actions that run on either ticket creation or ticket updates. There are many ways to use triggers in Zendesk, but generally speaking, most fall into the following categories:
- Assign tickets to a specific agent or a group of agents
- Change ticket field values or add/remove tags
- Notify users (or targets) of created or updated tickets
- Change user or organization field values (on ticket update only)
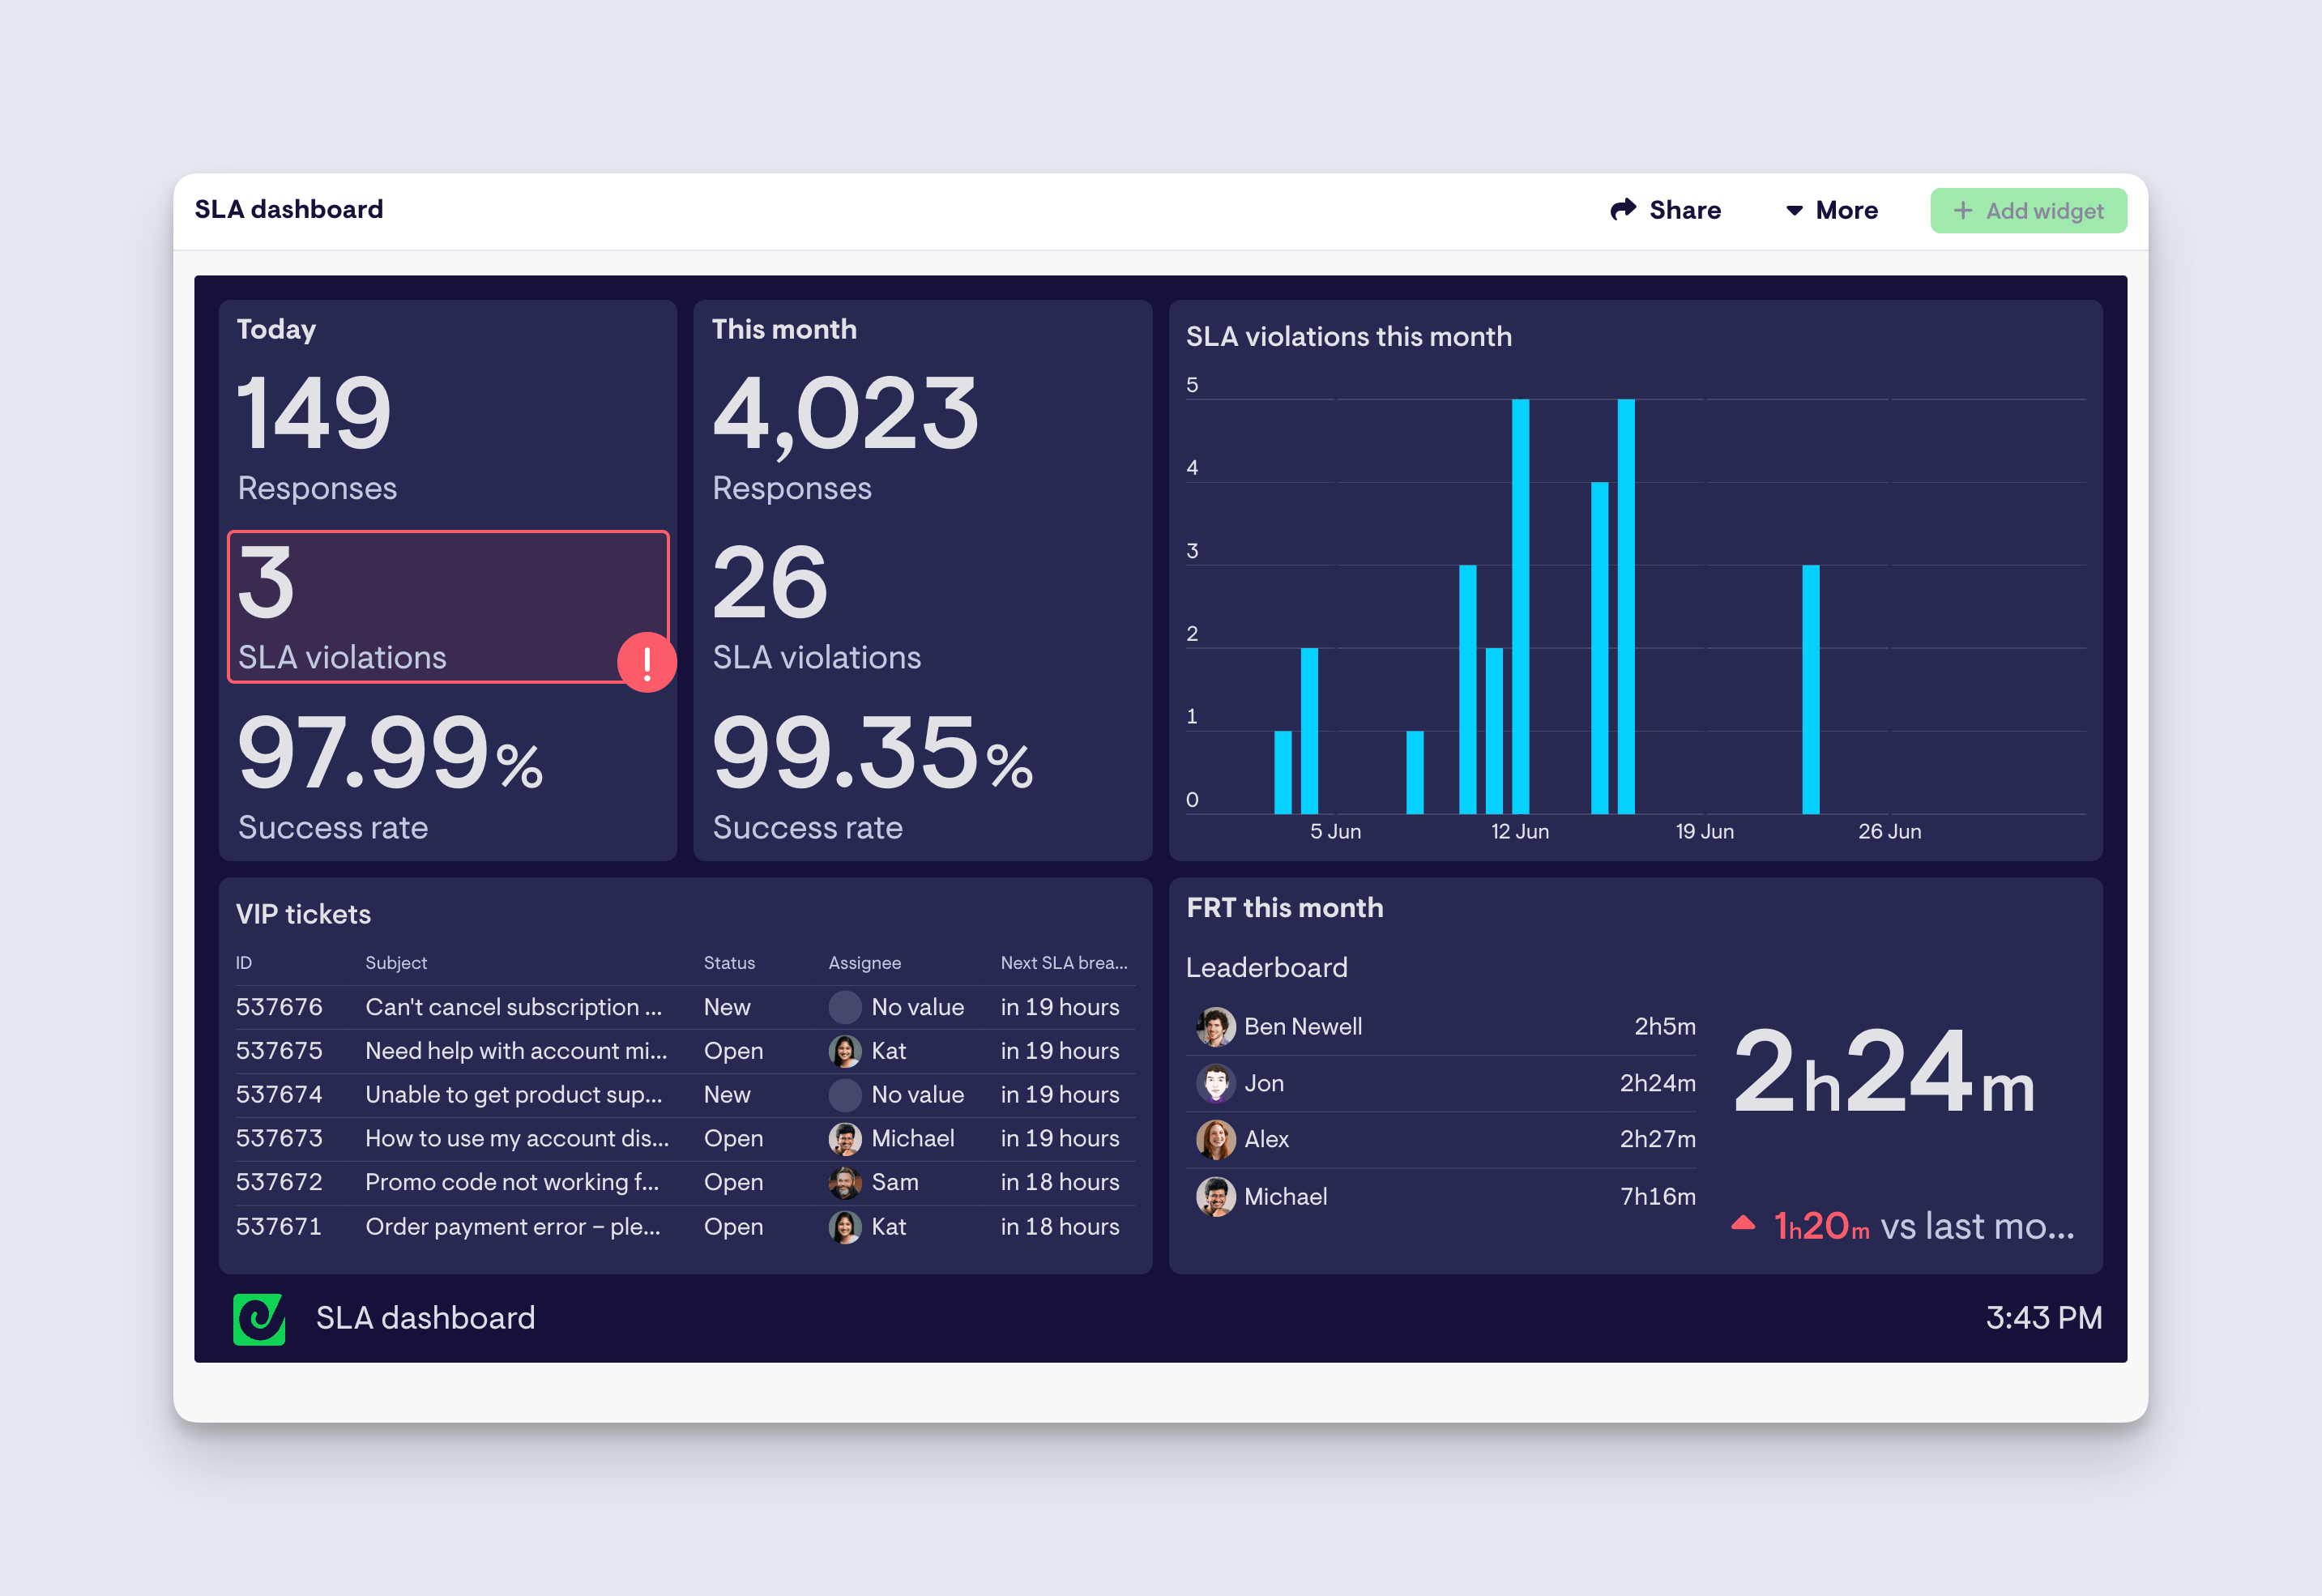
That means if you use a dashboard and reporting tool like Geckoboard, you can also use triggers to report on all the above. In other words, in the same way you can assign tickets to a specific agent or group, you can also add tags for reporting.
For example, if you have a trigger that assigns high-priority tickets to a VIP group, you can use the same trigger to assign both the tickets to the VIP group and to tag those tickets as vip. Finally, you can count how many tickets have the vip tag to know how many tickets were assigned to the VIP group today, this week, etc.
Why is this convenient?
Well, you can, of course, always count how many tickets are assigned, resolved, etc., by the VIP group, but what if the ticket gets reassigned later on or maybe at some point it gets unassigned (on purpose or by mistake)? Having the tag lets you know without a shadow of a doubt how many tickets were assigned to the VIP group at some point (whether they remained there or not).
Monitoring “First Contact Resolution” using Zendesk triggers
Using triggers to tag specific events and actions is very powerful, but triggers can also be used for tagging and reporting more complex situations. An example is keeping tabs on First Contact Resolution (or One Touch Resolution).
This is a prevalent metric that is often hard to keep track of as is not directly available in many systems. However, you can build FCR visualisations by creating a couple of simple triggers in your Zendesk account.
This article and support video explain where to find triggers in Zendesk as well as how to set one up.
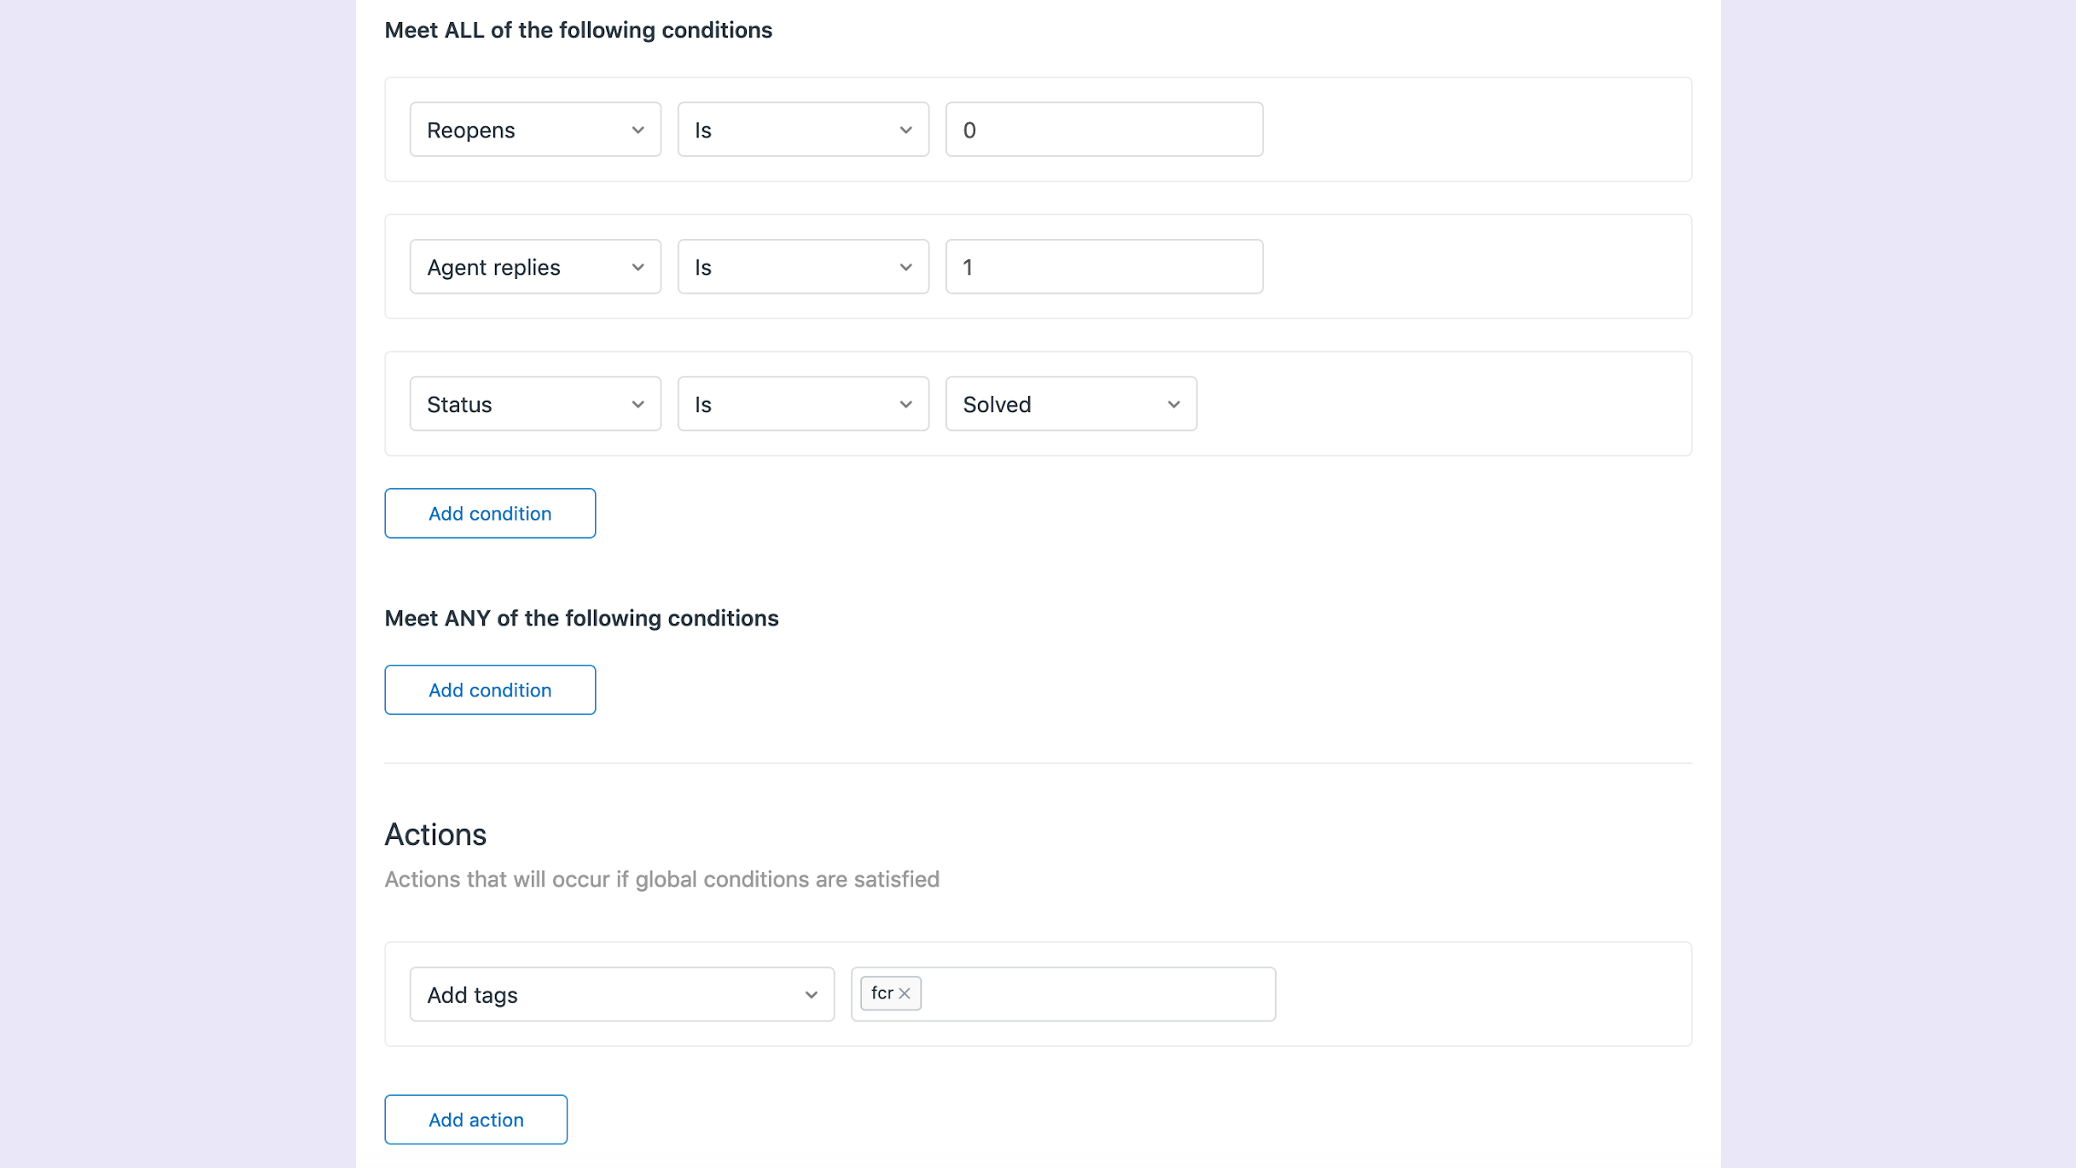
- Trigger #1 will tag tickets that are solved and have a single interaction with an agent.
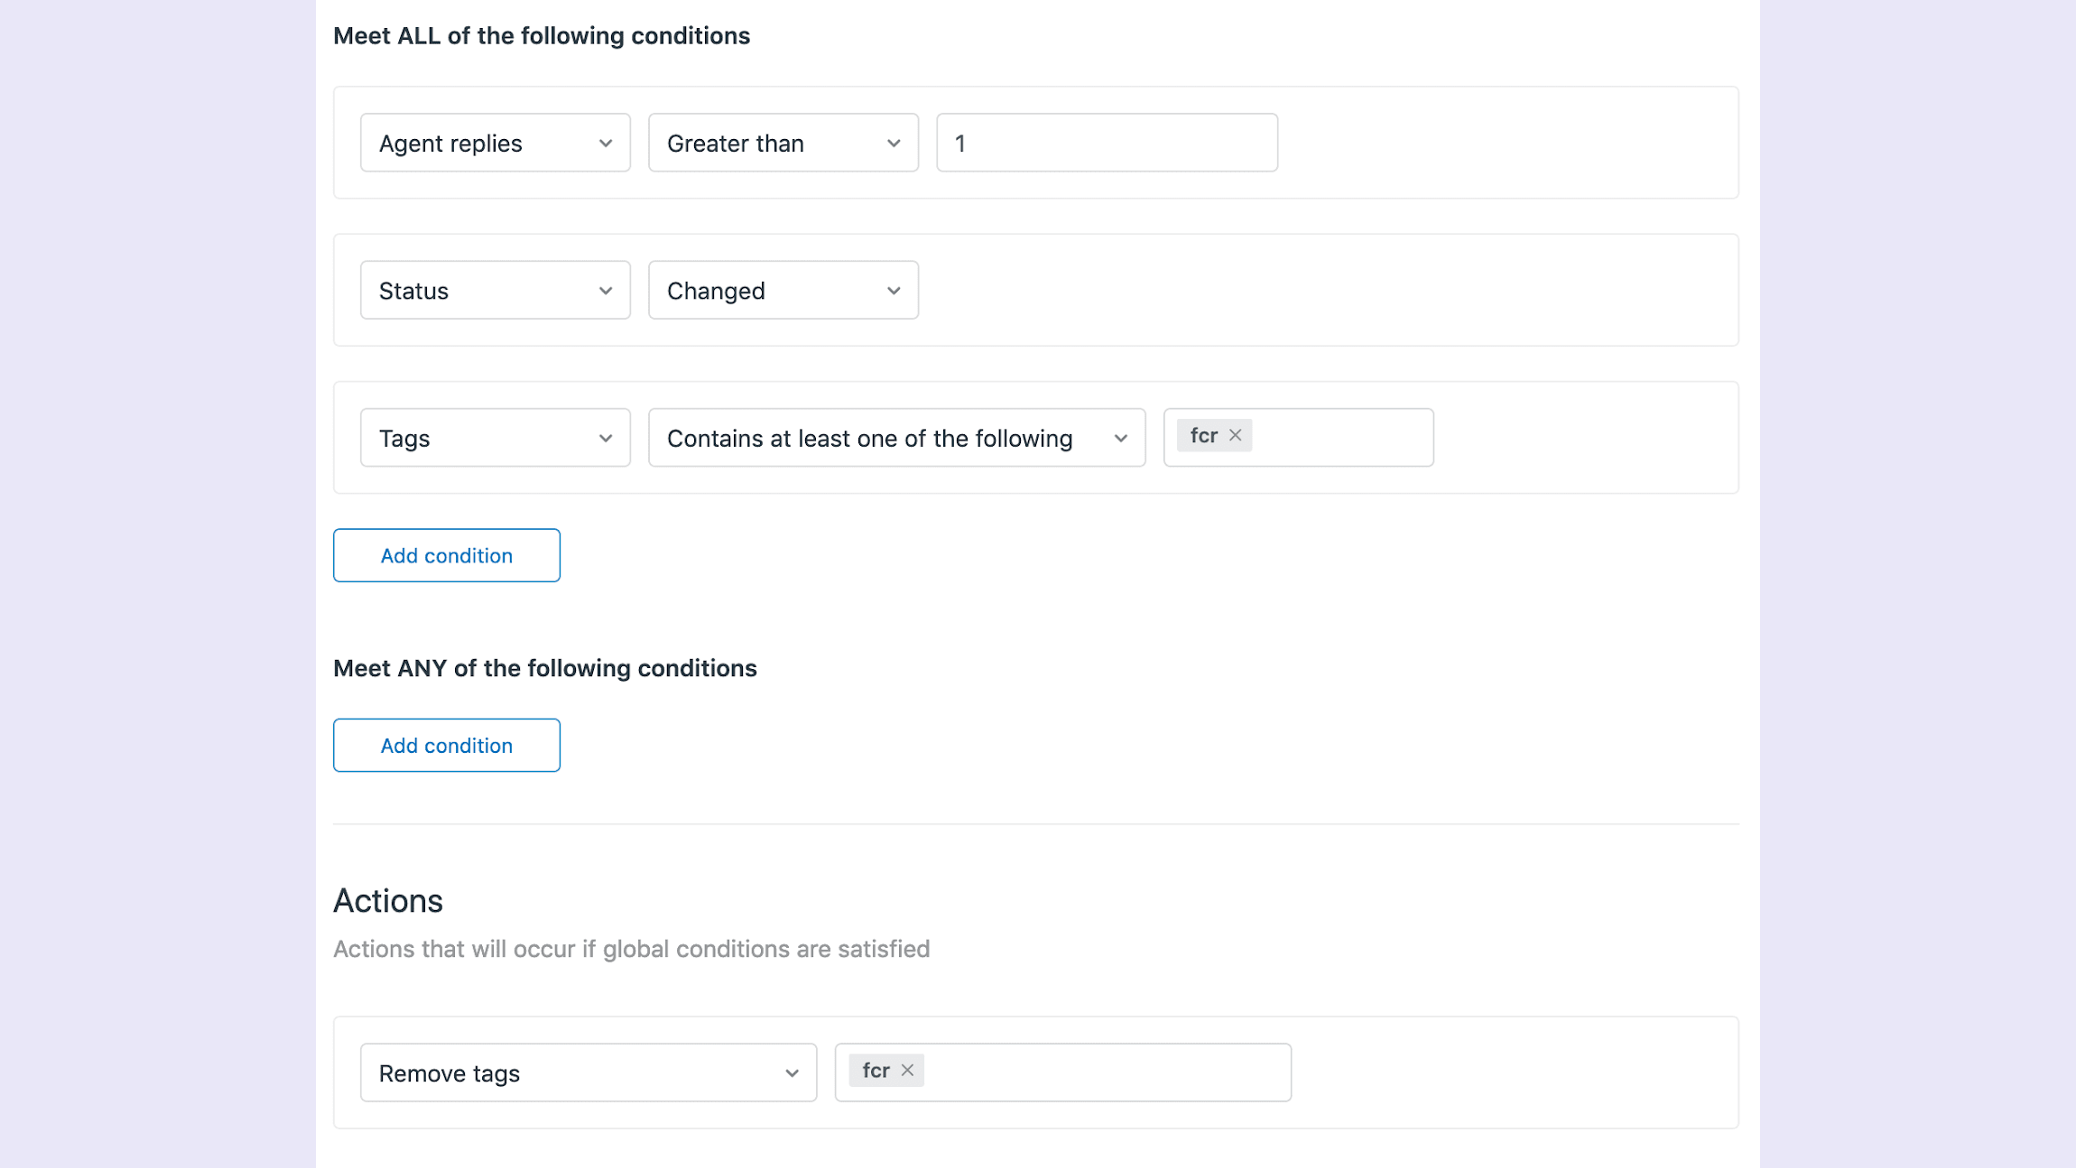
- Trigger #2 will remove that tag if a new contact occurs.
This approach means you ensure the tag is used exclusively for tickets solved in one interaction with the agent.
Step 1
Create the first trigger. Use conditions from the Meet ALL of the following conditions section. Then, add the following three conditions and actions.
Step 2
Create the second trigger. Again, use conditions from the Meet ALL of the following conditions section. Then, add the following three conditions and actions. With the triggers in place, you now have a reliable way to identify tickets that have been solved in a single interaction with agents.
Step 3
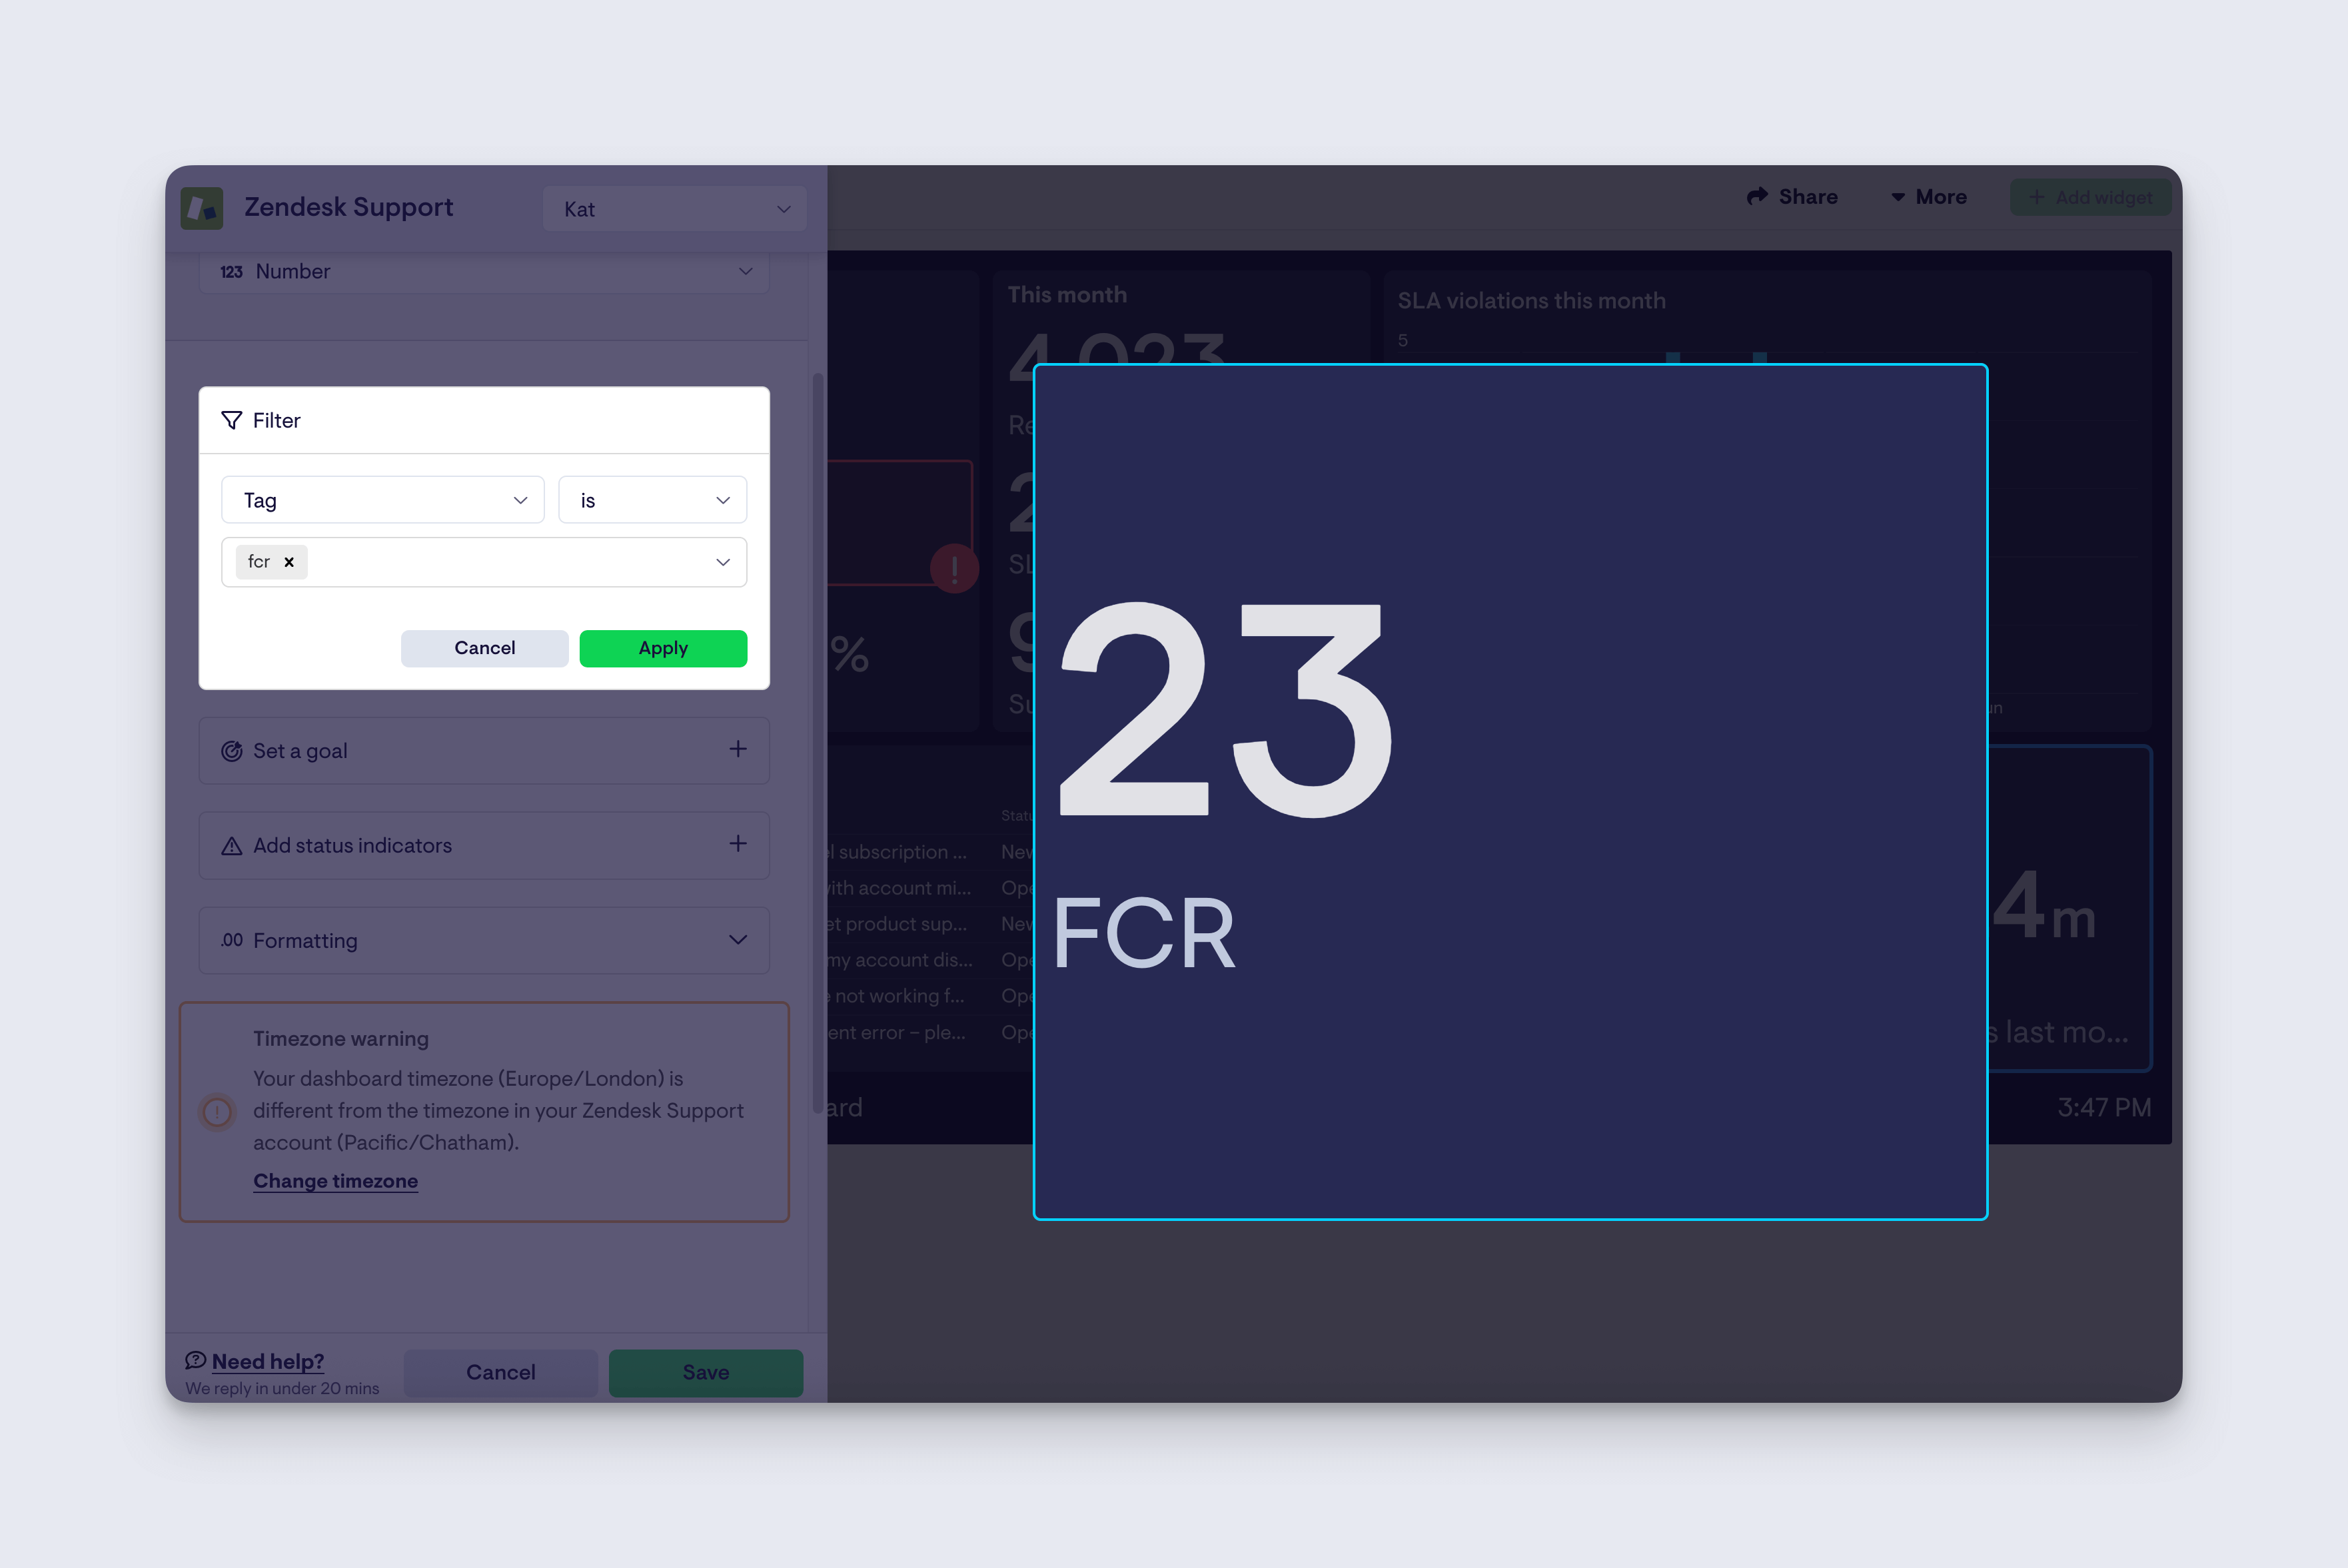
Finally, look for Received tickets that have the FCR tag used in your triggers. Using Geckoboard, you can now build number widgets, leaderboards or any other FCR visualizations.
Use triggers to build live dashboards
Using Geckoboard to visualize Zendesk metrics? Why not check out triggers? And if you can’t find a metric you need – get in touch with our helpful Support team. We'd be happy to help.
